Slide Layers
Contents
1. Add New Layer
back to menu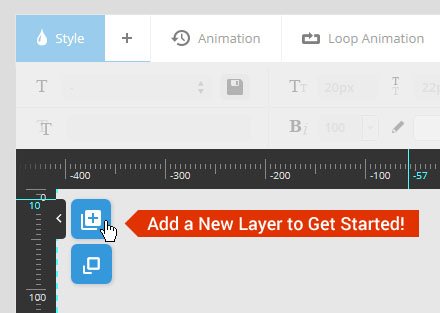
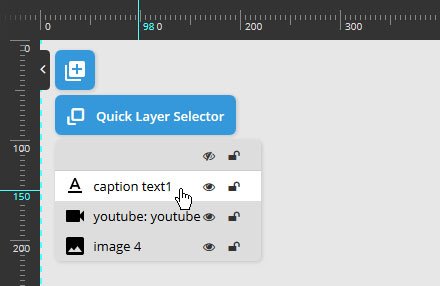
Quick Layer Selector
Toggle between layers for editing from the “Quick Layer Selector”.
- Quick Note
Toggling "layer visibility" here is for the WYSIWYG editor only (i.e. does not apply to the front-end version of the slider).

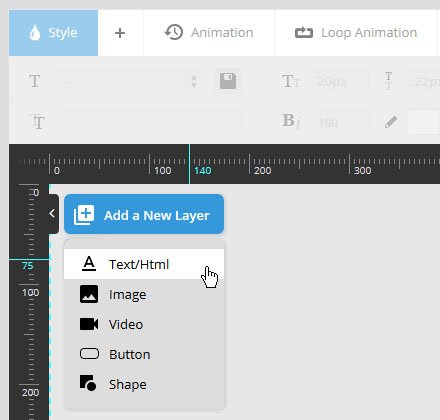
1.1 Text / HTML, Icons, Shortcodes
back to menuBasic Text
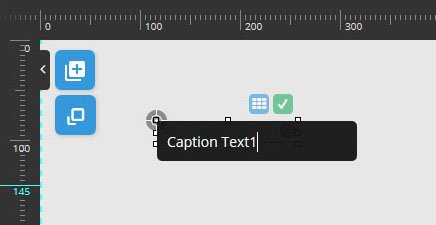
Type in some regular text to be used for the layer’s content.
HTML Markup
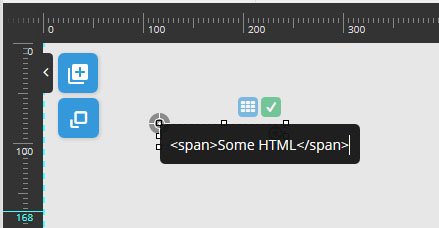
Enter raw HTML depending on your layer content needs.
- Special Note
Validate your HTML to make sure it doesn't break the page's markup.
1. Click the blue grid to add an icon.
2. Then choose from over 350+ possible icons.
3. And then after making a selection, the icon's HTML will automatically be entered into the layer.
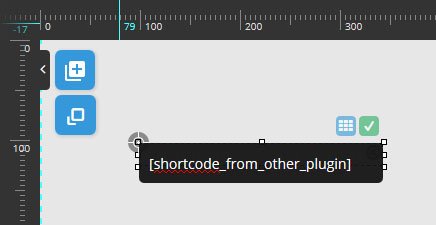
Add a shortcode from another plugin as the layer's content.
Most shortcodes from other plugins are automatically compatible, but if for some reason your shortcode’s content isn’t nshowing up correctly, the following Custom CSS will often help:
1 2 3 4 5 6 7 8 9 | .tp-caption ul, .tp-caption li { position: static !important; visibility: visible !important; } |
1.2 Add an Image Layer
back to menu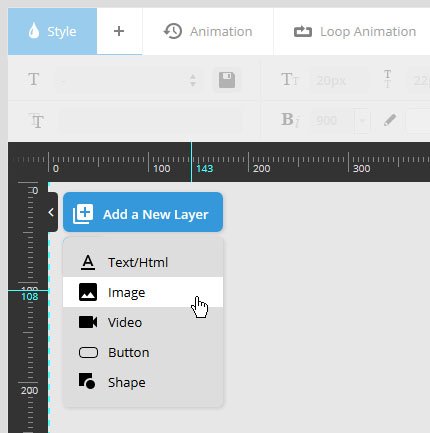
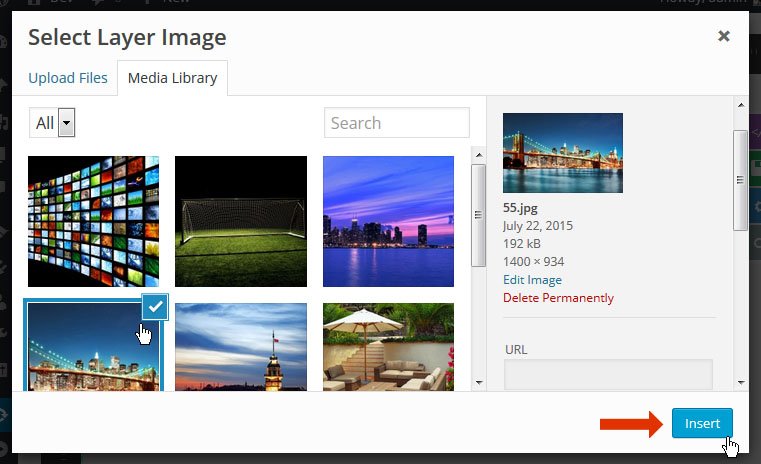
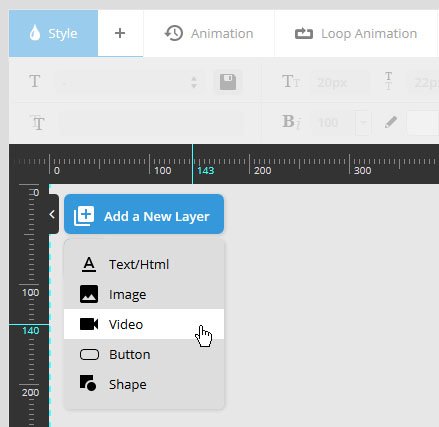
1.3 Add a YouTube, Vimeo or HTML5 Video
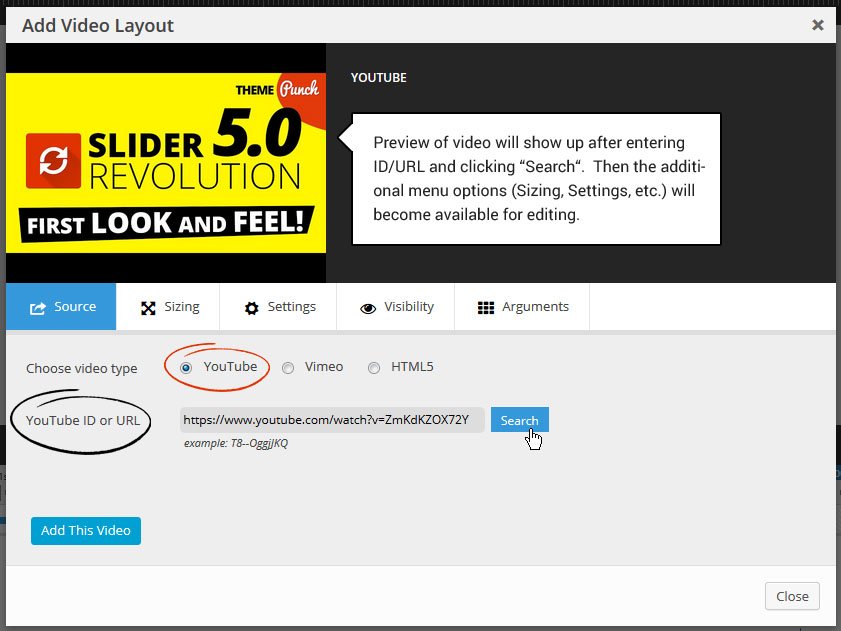
back to menuA. YouTube Source
Enter the YouTube ID or full URL, then click the “Search” button.
B. YouTube Sizing
back to menuFull Screen
OFF = YouTube’s video iframe will be whatever width and height you choose (see Layer Styles).
ON = YouTube’s video iframe will cover the enter size of the slider (width and height will both automatically set to 100%).
Force Cover
OFF = Video will have a CSS background-size of “contain”. This means the video will never be cropped, but depending on the video’s original size ratio in relation to the slider’s actual size, blank space on the sides of the video may occur.
ON = Video will have a CSS background-size of “cover”. This means the video will always cover the entire size of the slider, but depending on the video’s original size ratio in relation to the slider’s actual size, video cropping may occur.
Dotted Overlay *
Choose to display a “mesh-like” transparent graphic on top of the video, adding some extra style to the video.
* only applicable if “Force Cover” is set to “On”.
Aspect Ratio *
YouTube offers 2 versions of the video that can be loaded which are 16×9 or 4×3. For video backgrounds, 16×9 is usually best.
* only applicable if “Force Cover” is set to “On”

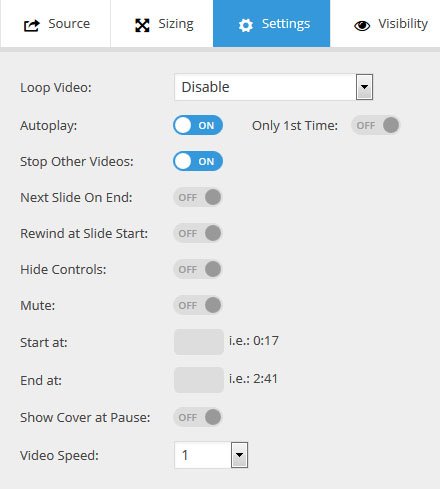
C. YouTube Settings
back to menuLoop Video
Disable:
Video will only play once each time the video is initially played.
Loop – Slide is paused:
Video will loop endlessly, and the slide will never change unless the slider’s navigation is used (next button clicked, etc.).
Loop – Slide does not stop:
Video will loop endlessly until the slide’s delay is reached. For example, if your slide’s are normally meant to be shown for 10 seconds, but your video’s length is only 5 seconds, the video will play twice before the slide actually changes.
Autoplay
Choose to autoplay the video when it animates into view.
If autoplay is chosen, you can then choose Only 1st Time, which means the video will only autoplay once.
Stop Other Videos
If more than one videos are present in the slide at the same time, choose this option to make sure only one video can be played at a time.
Next Slide on End
ON: Slide will immediately change as soon as the video ends.
OFF: If video’s length is less than the slide’s delay, the slide will not change until the delay time has been reached.
Rewind At Slide Start
ON: Video will always start from the beginning each time the slide is shown.
OFF: Once the video plays, if the slide is changed before the video actually ends, when coming back to the same slide, the video will resume playing from the same point.
Mute Video
Choose to mute the video’s volume if it normally has sound.
Start At / End At
Choose to start and/or end the video at a specific time, in minutes:seconds format.
Example “Start At” value: 00:17 (start the video 17 seconds in)
Example “End At” value: 02:17 (end the video at 2 minutes, 17 seconds)
Show Cover at Pause
Show the video’s preview image (see Visibility section) whenever the video is paused.
Video Speed
A special option to play the video at a “fast forward” speed.
D. YouTube Visibility
back to menu
- Quick Tip
For optimal performance, always use a preview image! This way the video will only load from YouTube.com when the video actually plays.
Preview Image
Enter a custom url, or click the “Image Library” button to choose an image from the WP Media library.
Or choose “Video Thumbnail”, which will then automatically load the video’s preview image from YouTube.com.
Disable Mobile
Choose to disable the video for mobile devices (video layer will simply not be shown).
Only Preview on Mobile
When enabled, only the video’s preview image will be shown on mobile devices (video will never be loaded).
- Play Button for your Preview Images
Use the following technique to display a play button on top of your preview images.
- Download the play button from YouTube.com, or create your own.
- If downloaded from YouTube, resize the button to 75x53 in Photoshop.
- Upload the button graphic to your site, and make note of its url location.
- Add the following CSS to the slider's Custom CSS section.
1 2 3 4 5 6 7 8 9 10 11 12 13 14 15 16 17 18 | .tp-caption .tp-videoposter:after { background-image: url(http://site.com/wp-content/uploads/2015/07/youtube.png); background-position: center center; background-repeat: no-repeat; position: absolute; top: 50%; left: 50%; margin: -26px 0 0 -37px; content: ""; width: 75px; height: 53px; } |

E. YouTube Arguments
back to menu
“Arguments” are additional parameters that can be passed to the video from this list.
Not all params are supported, but useful options from the list are “rel”, “iv_load_policy”, and “modestbranding” (see link above for descriptions of these params).
To add an additional parameter, prepend it to the beginning of the default params string.
For example, this:
1 2 3 | hd=1&wmode=opaque&showinfo=0&ref=0; |
would become this:
1 2 3 | rel=0&hd=1&wmode=opaque&showinfo=0&ref=0; |
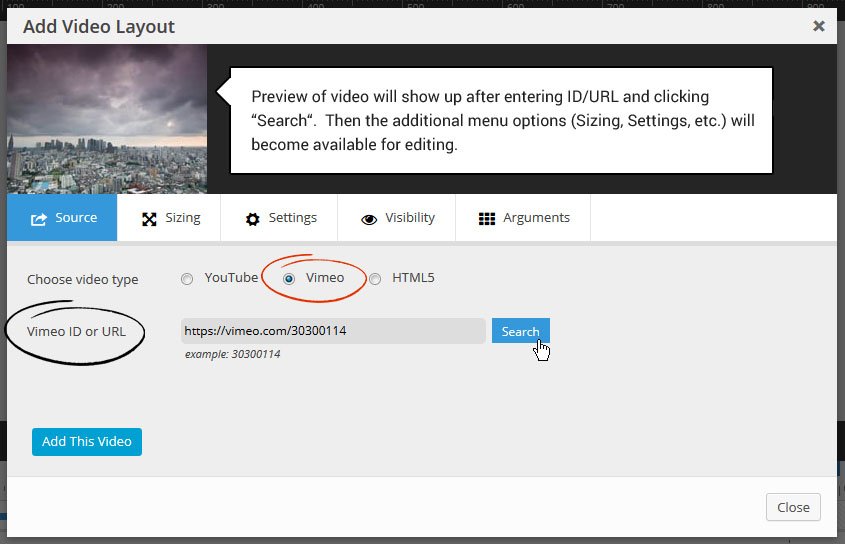
A. Vimeo Source
Enter the Vimeo ID or full URL, then click the “Search” button.
B. Vimeo Sizing
back to menuFull Screen
OFF = Vimeo’s video iframe will be whatever width and height you choose (see Layer Styles).
ON = Vimeo’s video iframe will cover the enter size of the slider (width and height will both automatically set to 100%).
Force Cover
OFF = Video will have a CSS background-size of “contain”. This means the video will never be cropped, but depending on the video’s original size ratio in relation to the slider’s actual size, blank space on the sides of the video may occur.
ON = Video will have a CSS background-size of “cover”. This means the video will always cover the entire size of the slider, but depending on the video’s original size ratio in relation to the slider’s actual size, video cropping may occur.
Dotted Overlay *
Choose to display a “mesh-like” transparent graphic on top of the video, adding some extra style to the video.
* only applicable if “Force Cover” is set to “On”.
Aspect Ratio *
Vimeo offers 2 versions of the video that can be loaded which are 16×9 or 4×3. For video backgrounds, 16×9 is usually best.
* only applicable if “Force Cover” is set to “On”

C. Vimeo Settings
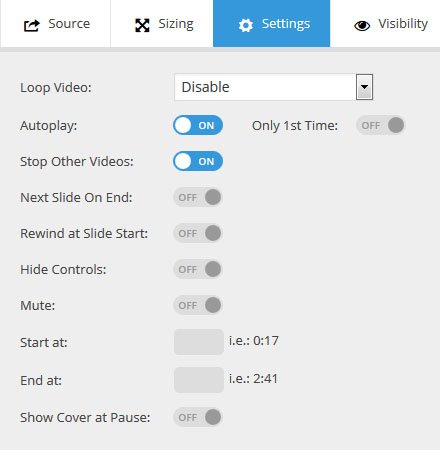
back to menuLoop Video
Disable:
Video will only play once each time the video is initially played.
Loop – Slide is paused:
Video will loop endlessly, and the slide will never change unless the slider’s navigation is used (next button clicked, etc.).
Loop – Slide does not stop:
Video will loop endlessly until the slide’s delay is reached. For example, if your slide’s are normally meant to be shown for 10 seconds, but your video’s length is only 5 seconds, the video will play twice before the slide actually changes.
Autoplay
Choose to autoplay the video when it animates into view.
If autoplay is chosen, you can then choose Only 1st Time, which means the video will only autoplay once.
Stop Other Videos
Next Slide on End
Rewind At Slide Start
Mute Video
Start At / End At
Example “Start At” value: 00:17 (start the video 17 seconds in)
Example “End At” value: 02:17 (end the video at 2 minutes, 17 seconds)
Show Cover at Pause
C. Vimeo Visibility
back to menu
- Quick Tip
For optimal performance, always use a preview image! This way the video will only load from Vimeo.com when the video actually plays.
Preview Image
Enter a custom url, or click the “Image Library” button to choose an image from the WP Media library.
Or choose “Video Thumbnail”, which will then automatically load the video’s preview image from Vimeo.com.
Disable Mobile
Choose to disable the video for mobile devices (video layer will simply not be shown).
Only Preview on Mobile
When enabled, only the video’s preview image will be shown on mobile devices (video will never be loaded).
- Play Button for your Preview Images
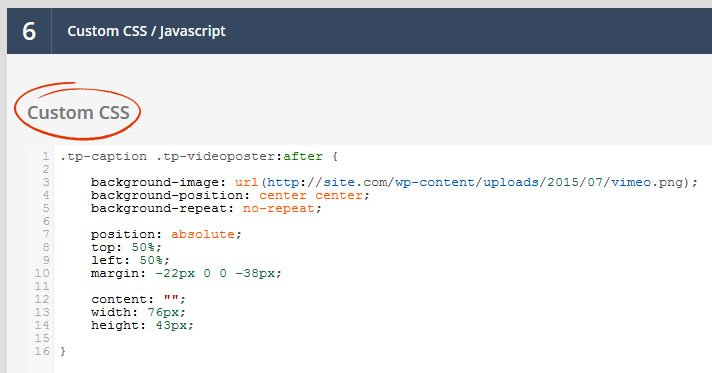
Use the following technique to display a play button on top of your preview images.
- Download this PSD and extract its play button graphic, or create your own.
- Resize the play button to 76x43 in Photoshop.
- Upload the button graphic to your site, and make note of its url location.
- Add the following CSS to the slider's Custom CSS section.
1 2 3 4 5 6 7 8 9 10 11 12 13 14 15 16 17 18 | .tp-caption .tp-videoposter:after { background-image: url(http://site.com/wp-content/uploads/2015/07/vimeo.png); background-position: center center; background-repeat: no-repeat; position: absolute; top: 50%; left: 50%; margin: -22px 0 0 -38px; content: ""; width: 76px; height: 43px; } |
E. Vimeo Arguments
back to menu
Additional parameters that can be passed to the video from this list.
Useful options from the list are “color” and “title” (see link above for descriptions of these params).
To add an additional parameter, prepend it to the beginning of the default params string.
For example, this:
1 2 3 | title=0&byline=0&portrait=0&api=1 |
would become this:
1 2 3 | color=00adef&title=0color=00adef&&byline=0&portrait=0&api=1 |
A. HTML5 Video Source

- Quick Tip
For optimal performance, use a poster/preview image in addition to "Video Preload -> Disable" (see settings here). This way the video will only load when the it actually plays.
Poster Image URL
Click “Set Image” to choose a preview/poster image for the video from your WP Media library, or enter url to the image directly.
MP4, WEBM & OGV Url
Upload your video files to your website via ftp, and then enter their url locations here.
You could also use the “Set Video” option to choose or upload a video from your WP Media library, but depending on the size of your video(s), they may need to be uploaded via ftp.
An “.mp4″ version of your video is mandatory, and will work almost everywhere except Firefox on Macs. Because of this, it’s also important to include an alternative version of the video, which can be either “WEBM” or “OGV”. Firefox on Mac supports both of these, so you only need one or the other.
Here’s a free tool you can use to create “ogv” and “webm” versions of your video.
B. HTML5 Video Sizing
back to menuFull Screen
OFF = Video size will be whatever width and height you choose (see Layer Styles).
ON = Video will cover the enter size of the slider (width and height will both automatically set to 100%).
Force Cover
OFF = Video will have a CSS background-size of “contain”. This means the video will never be cropped, but depending on the video’s original size ratio in relation to the slider’s actual size, blank space on the sides of the video may occur.
ON = Video will have a CSS background-size of “cover”. This means the video will always cover the entire size of the slider, but depending on the video’s original size ratio in relation to the slider’s actual size, video cropping may occur.
Dotted Overlay *
Choose to display a “mesh-like” transparent graphic on top of the video, adding some extra style to the video.
* only applicable if “Force Cover” is set to “On”.
Aspect Ratio *
Choose which aspect ratio the video should be resized by. For video backgrounds, 16×9 is usually best.
* only applicable if “Force Cover” is set to “On”

C. HTML5 Video Settings
back to menuLoop Video
Disable:
Video will only play once each time the video is initially played.
Loop – Slide is paused:
Video will loop endlessly, and the slide will never change unless the slider’s navigation is used (next button clicked, etc.).
Loop – Slide does not stop:
Video will loop endlessly until the slide’s delay is reached. For example, if your slide’s are normally meant to be shown for 10 seconds, but your video’s length is only 5 seconds, the video will play twice before the slide actually changes.
Autoplay
Choose to autoplay the video when it animates into view.
If autoplay is chosen, you can then choose Only 1st Time, which means the video will only autoplay once.
Stop Other Videos
If more than one videos are present in the slide at the same time, choose this option to make sure only one video can be played at a time.
Next Slide on End
ON: Slide will immediately change as soon as the video ends.
OFF: If video’s length is less than the slide’s delay, the slide will not change until the delay time has been reached.
Rewind at Slide Start
ON: Video will always start from the beginning each time the slide is shown.
OFF: Once the video plays, if the slide is changed before the video actually ends, when coming back to the same slide, the video will resume playing from the same point.
Mute Video
Choose to mute the video’s volume if it normally has sound.
Start At / End At
Choose to start and/or end the video at a specific time, in minutes:seconds format.
Example “Start At” value: 00:17 (start the video 17 seconds in)
Example “End At” value: 02:17 (end the video at 2 minutes, 17 seconds)
Show Cover at Pause
Show the video’s preview image (see Source section) whenever the video is paused.
Video Preload
The preloading behaviour for the video.
If the video is meant to autoplay as soon as its shown, choose “Auto”.
If autoplay is disabled, choose “Disable” or “Meta”.

D. HTML5 Video Visibility
back to menuDisable Mobile
Choose to disable the video for mobile devices (video layer will simply not be shown).
Only Preview on Mobile
When enabled, only the video’s preview/poster image will be shown on mobile devices (video will never be loaded).

1.4 Add a Button
back to menu
Add Traditional Button

Preview Canvas:
Toggle between the “white” and “black” squares at the top left to see what the button would look like on a light or dark canvas.
Text:
Edit the button’s default text to be included with the button.
Idle State:
Choose the button’s default background color, text color, border styles, icon* and font-family.
Hover State:
Choose the background color, text color, border styles, icon* and font-family for the button on mouseover.
* Some buttons include an icon in the default state, and some include the icon on rollover (hover your mouse over the different buttons to see which ones include an icon on rollover).
Add Predefined Button
Scroll the left panel to see the list of predefined buttons that can be chosen from.

1.5 Add a Shape
back to menu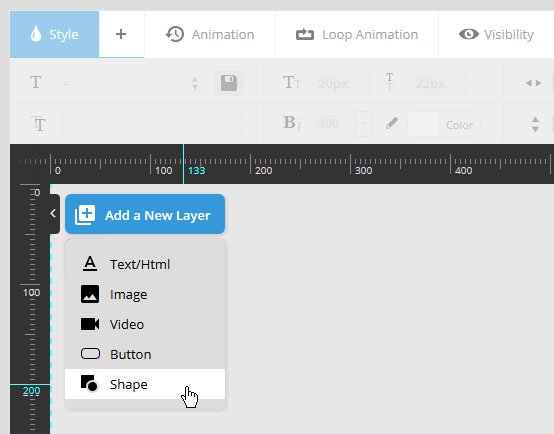
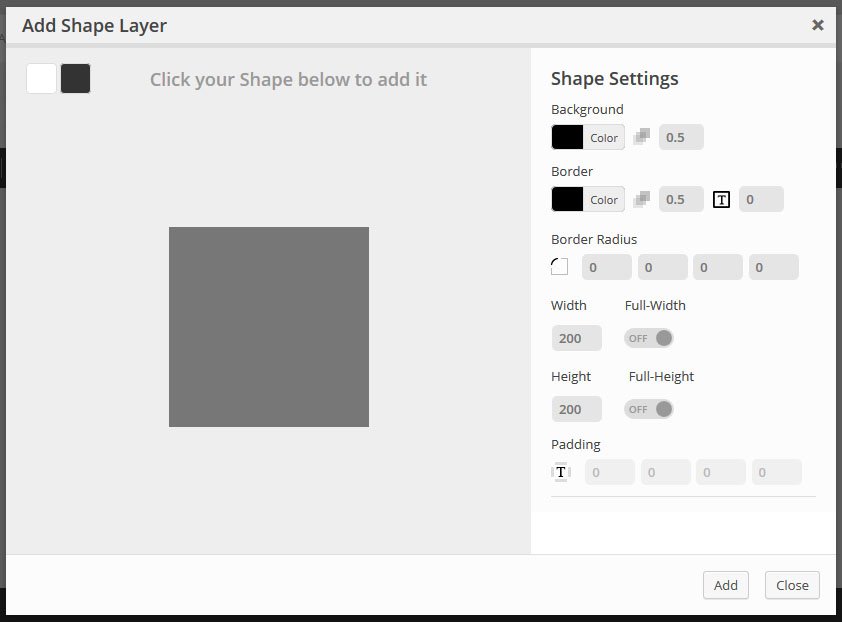
Toggle the white and black squares in the top left corner to see what the shape would look like against a light or dark background. Then adjust the shapes colors, opacity, border and size.
When both “Full Width” and “Full Height” are selected, you’ll then have the ability to enter some padding for the shape, which can be based on pixels or a percentage.
2. Layer Editing & Controls
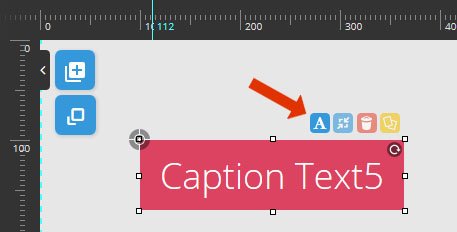
back to menuAfter adding a content layer to the slide, click the tabs below to see how the original content can be edited.
Edit Text/HTML
Save Changes

Additional Layer Controls
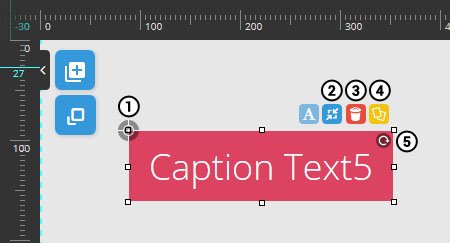
- 1. Move/Position Layer
- 2. Snap Layer Size Back to Normal
- 3. Delete Current Layer
- 4. Duplicate Layer Layer
- 5. Apply Rotation to Layer
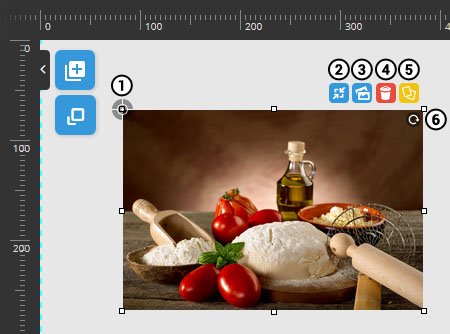
- 1. Move/Position Layer
- 2. Reset Image Size Back to Normal
- 3. Change Image Source
- 4. Delete Current Layer
- 5. Duplicate Layer Layer
- 6. Apply Rotation to Layer
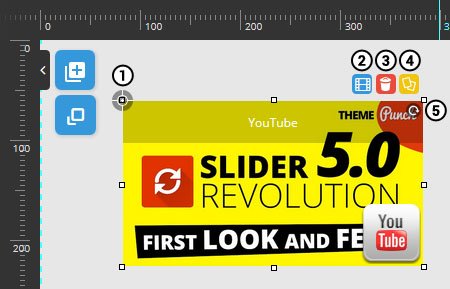
- 1. Move/Position Layer
- 2. Edit Video Settings
- 3. Delete Current Layer
- 4. Duplicate Layer Layer
- 5. Apply Rotation to Layer
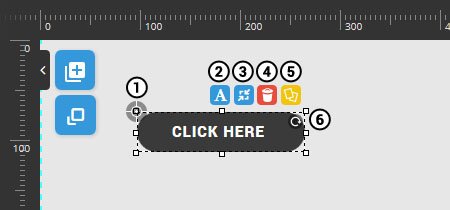
- 1. Move/Position Layer
- 2. Edit Button Text
- 3. Snap Size back to Normal
- 4. Delete Current Layer
- 5. Duplicate Layer Layer
- 6. Apply Rotation to Layer
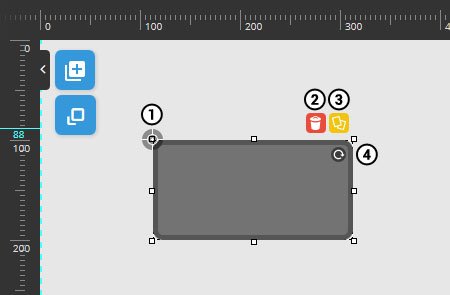
- 1. Move/Position Layer
- 2. Delete Current Layer
- 3. Duplicate Layer Layer
- 4. Apply Rotation to Layer
3. Slide/Layer Canvas
back to menuThe layer’s WYSIWYG editor is a visual representation of the current slide.
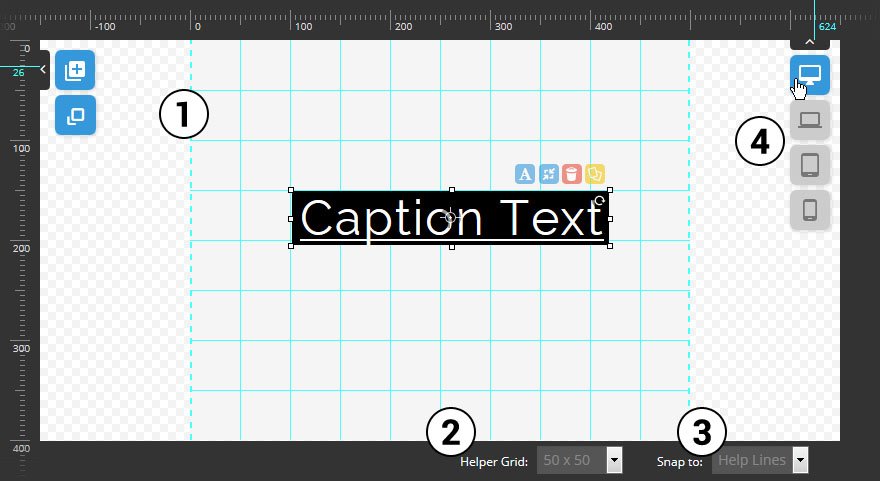
- 1. Layers Grid Boundary
- 2. Helper Grid Guide Lines
- 3. Snap to:
- 4. Screen/Device
1. Layers Grid Boundary
The green dotted lines that represent the current Layers Grid size based the Screen/Device selection (#4).
See “Special Note” below for important layer positioning information.
2. Helper Grid Guide Lines
The solid green lines as shown in the screenshot above. These are optional pixel based guide lines that can help when positioning your layers on the canvas.
3. Snap to:
When dragging and dropping your Layers around the canvas, you can choose to snap the Layer’s position based on the Helper Grid Lines or in relation to other layers.
4. Screen/Device
To use this option, you first have to enable a Custom Grid Size for additional screens/devices.
Toggling between the different options here will allow you to style and position your Layer content based on the selected screen/device.
For example, if you had a text-based layer, you could assign it a font-size of 64px, with a top-right position for desktop view. Then if you switch to the smartphone view, you could change the layer’s font-size to 32px, and give it a bottom-left position.
- SPECIAL NOTE: Always Position your Layers inside the Layers Grid!
Otherwise your layer content may bleed off the screen when the slider is resized.
GOOD!
Layer Positioned Inside the Layer's Grid (dotted green lines).
Incorrect Position!
Layer Positioned OUTSIDE the Layer's Grid (dotted green lines). In this case, the layer may bleed off the screen (not be fully visible) when the slider is resized!

