
- Get Started & Demo Data
- Menus
- Pages
- Widgets
- Customize
- Tips and Tricks
- Translation
- SEO
- Update
- Support
Get Started & Demo Data
Introduction
Thank you for purchasing our theme.
This guide provides instructions for installation, help on getting started and extensive documentation of features. It is recommended you read it thoroughly to fully leverage the theme's capabilities. Please also make sure to check out our Video Tutorials as they explain everything covered in here in greater depth. We hope you enjoy building with the theme as much as we enjoyed developing it and continue to develop with new features!
WPFaramond has supports for popular Jetpack plugin, and also provide free-customization if you don't want to use built-in Jetpack supports.
Installing WordPress
Before beginning the installation and configuring of your new theme, you must first have WordPress already installed on a server.
If you are struggling, here is a very detailed guide at Wordpress Codex that will walk you through every step.
If you prefer something more visual, you can watch this video tutorial on how to install Wordpress by us
(Please note the video shown is from our NUVO Restaurant theme, but the same process applies)
Installing The Theme
Once you have setup a copy of WordPress, there are two ways you can go about installing the theme:
- 1. FTP Upload
Unzip the download and upload the theme directory /Charixy/ into your WordPress themes directory /wp-content/themes/.
- 2. WordPress Upload
This is definitely the easier route for most. Simply navigate to Appearance > Themes > Add New > Upload Theme. Click the 'browse' button and locate the still zipped theme folder. The theme will be uploaded and installed in a matter of seconds.
Here is our video tutorial to help you through the process
(Please note the video shown is from our NUVO Restaurant theme, but the same process applies)
After you have installed the theme successfully, you can optionally import the supplied dummy data in order to get a feel for things. If you're interested in importing the data, please check the Demo Data section below
Installing plugins required
Once you have installed and activated our theme you will be prompted to install required and recommended plugins. Just click the link to Begin installing plugins.

Next, check boxes to select all the plugins you want to install, select the bulk action of install from the dropdown box and then click the button to apply.

Next, just click the link to Return to Required Plugins Installer.
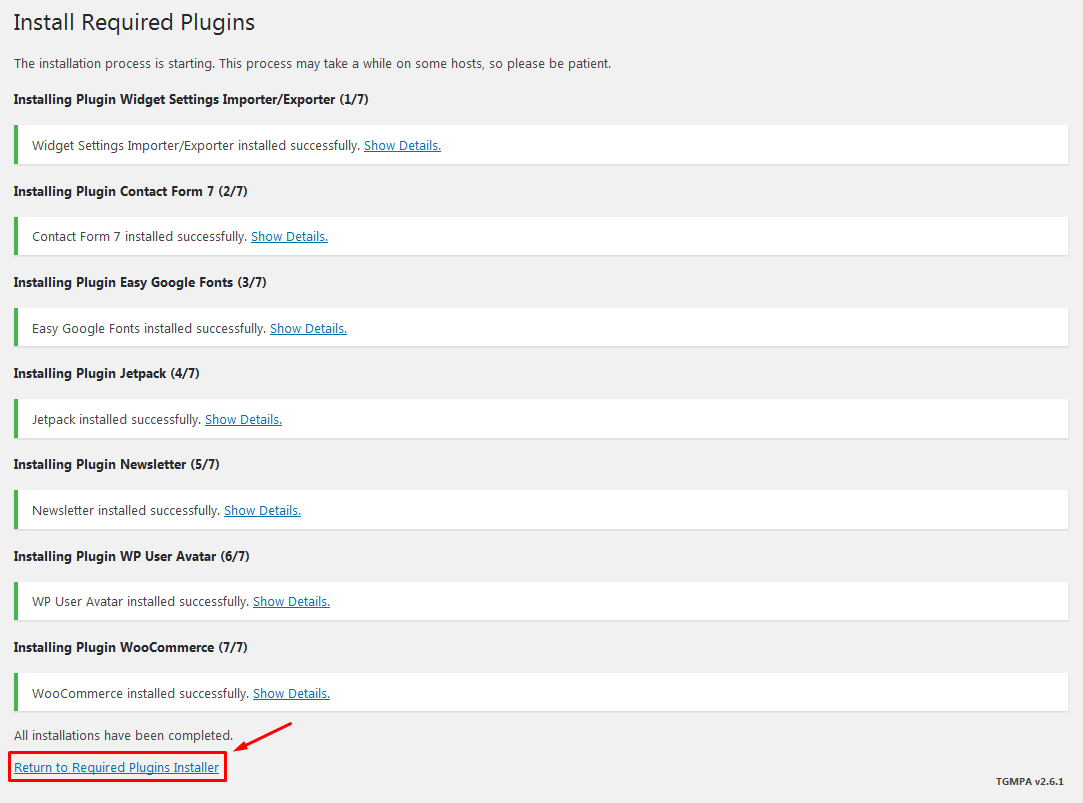
Select the plugins you had installed, and then apply the bulk action to activate them.

Finally, you will got a confirmation notice that your plugins were actived.

Import Demo Data
Step-1: Import XML file
To imprort demo content you need to extra theme package file. And please follow some steps below:
1. Go to Tools > Import.


2. Click Browse... button to upload xml file. You can find it on the path: wp-faramond > sampledata > faramond.xml

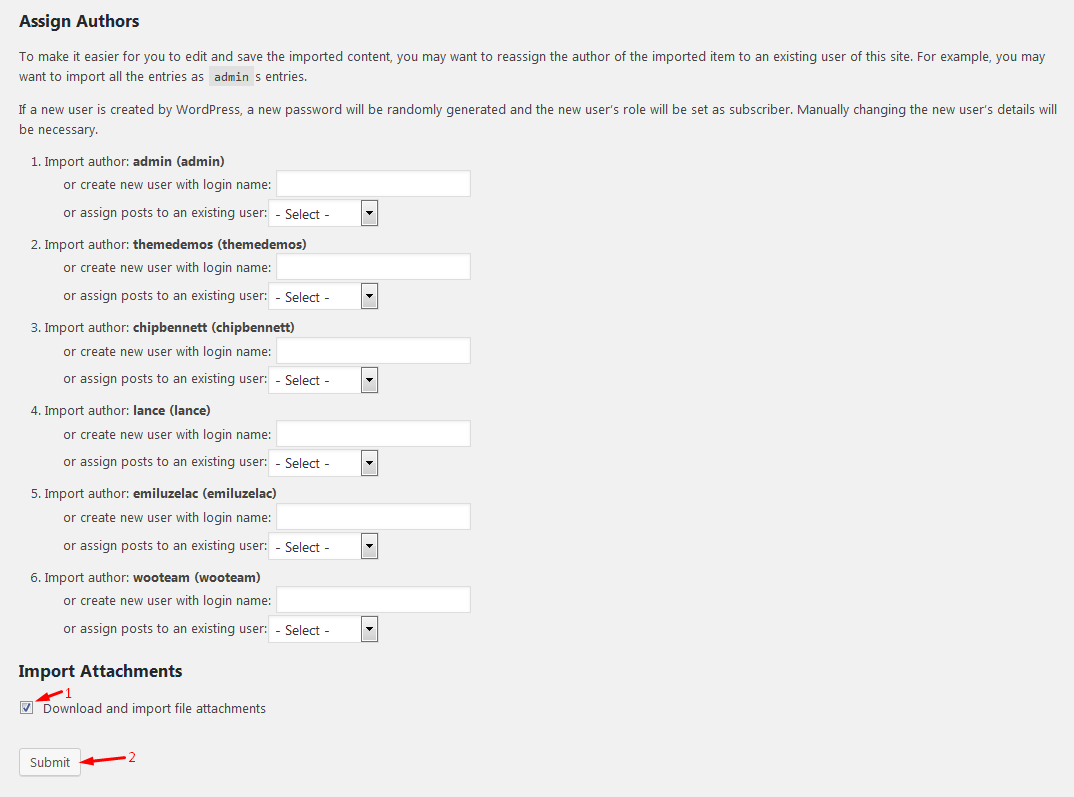
Step-2: Import widgets
1. Go to Widget Importer & Exporter on the Tools menu.

2. Click Select a file button and upload file widget_data.json on the path wp-faramond > sampledata > widget_data.json

3. If while update, you got a message as the image below:

Please add this code define( 'ALLOW_UNFILTERED_UPLOADS', true ); to wp-config.php file on the path below and save.
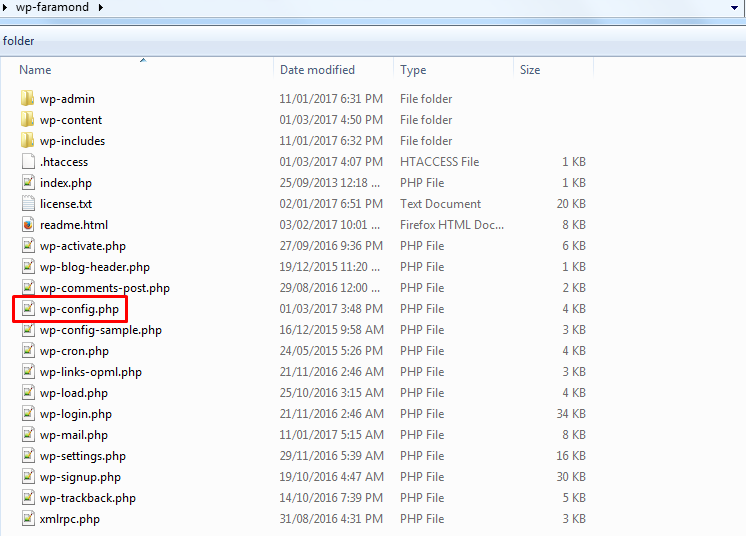
4. Then, do step 3 again to Import widgets

5. All have done.
Menus
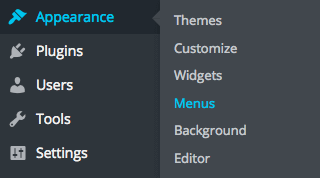
Creating Menus
- From the Appearance menu on the left-hand side of the Dashboard, select the Menus option to bring up the Menu Editor.
- Click on Create a new menu at the top of the page.

- Enter a name for your new menu in the Menu Name box then click Create Menu button.

Your new menu has been defined. Now it's time to add menu items.
Adding items to a menu
You can add different link types into your menu, these are split between panes left of the menu you're currently editing.
- Select your menu.
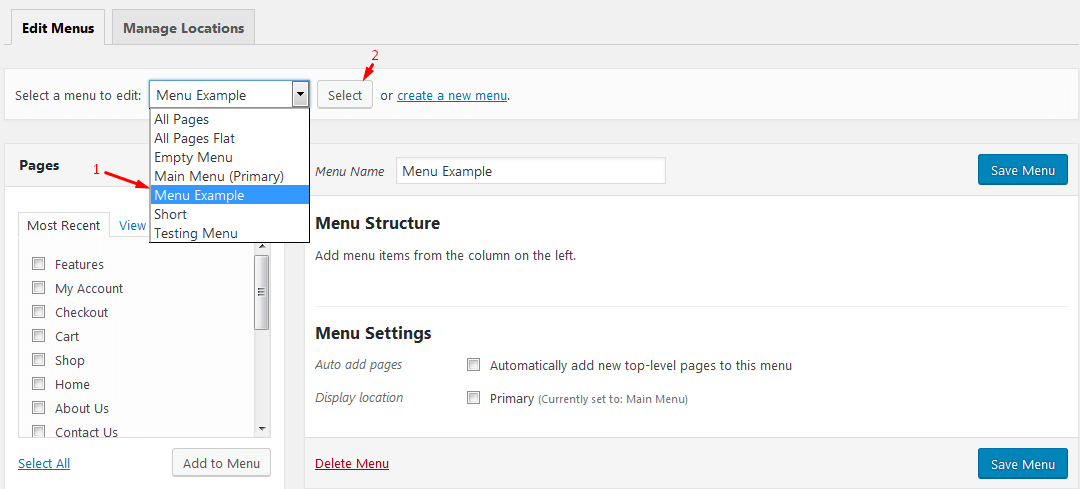
- Locate the pane entitled Pages.
- Within this pane, select the View All link to bring up a list of all the currently published Pages on your site.
- Select the Pages that you want to add by clicking the checkbox next to each Page's title. You can use the same method for Posts, Categories...
- Click the Add to Menu button located at the bottom of this pane to add your selection(s) to the menu that you created in the previous step.

- Click the Save Menu button once you've added all the menu items you want.

Creating multi-level Menus
When planning the structure of your menu, it helps to think of each menu item as a heading in a formal report document. In a formal report, main section headings (Level 1 headings) are the nearest to the left of the page; sub-section headings (Level 2 headings) are indented slightly further to the right; any other subordinate headings (Level 3, 4, etc) within the same section are indented even further to the right.
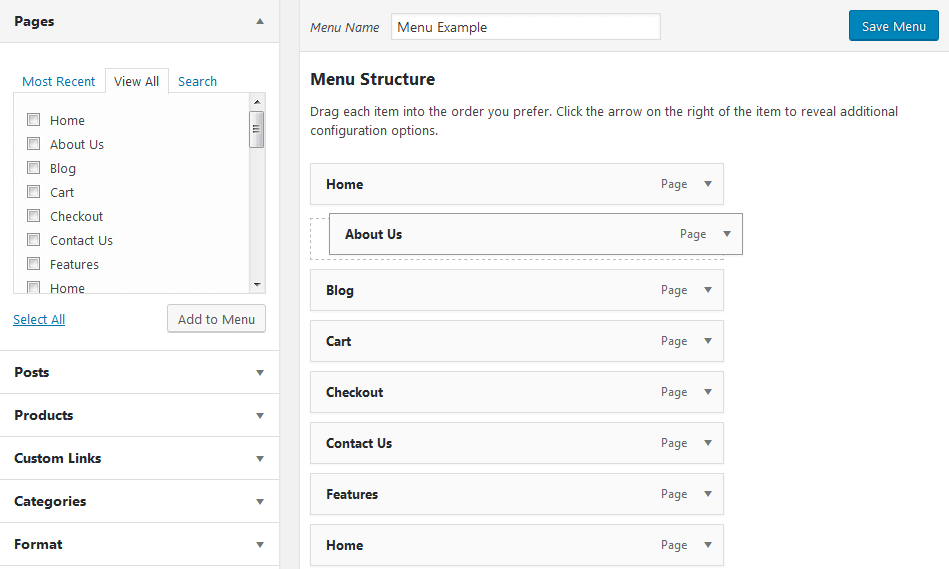
The WordPress menu editor allows you to create multi-level menus using a simple 'drag and drop' interface. Drag menu items up or down to change their order of appearance in the menu. Drag menu items left or right in order to create sub-levels within your menu.
To make one menu item a subordinate of another, you need to position the 'child' underneath its 'parent' and then drag it slightly to the right.
- Position the mouse over the 'child' menu item.
- Whilst holding the left mouse button, drag it to the right.
- Release the mouse button.
- Repeat these steps for each sub-menu item.
- Click the Save Menu button in the Menu Editor to save your changes.
Assign Menus to the site
- Scroll to the bottom of the menu editor window.
In the section titled Theme locations, click the check box for the location where you want your menu to appear.

You can also set any menu as Primary menu at Manager Locations tab.
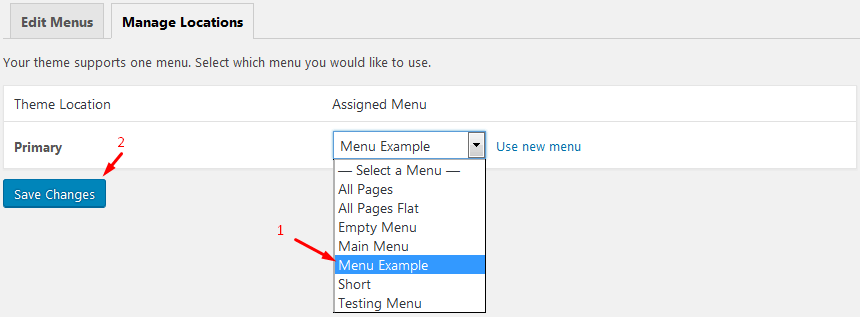
- Click Save menu once you've made your selection.
Pages
Default Templates
WPFaramond comes with 7 pre-defined page templates.
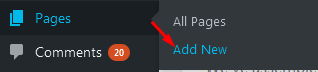
The first to create a new page, go Page > Add New on the left menu.
WPFaramond comes with 4 pre-defined page templates.

To create page Default tempale. After create a new page, enter the page title, content and select template is Default template.

Below is result for Default template:

About Template
Similar Default template, just select About template and enter content, select feature image then you want to show on your page.
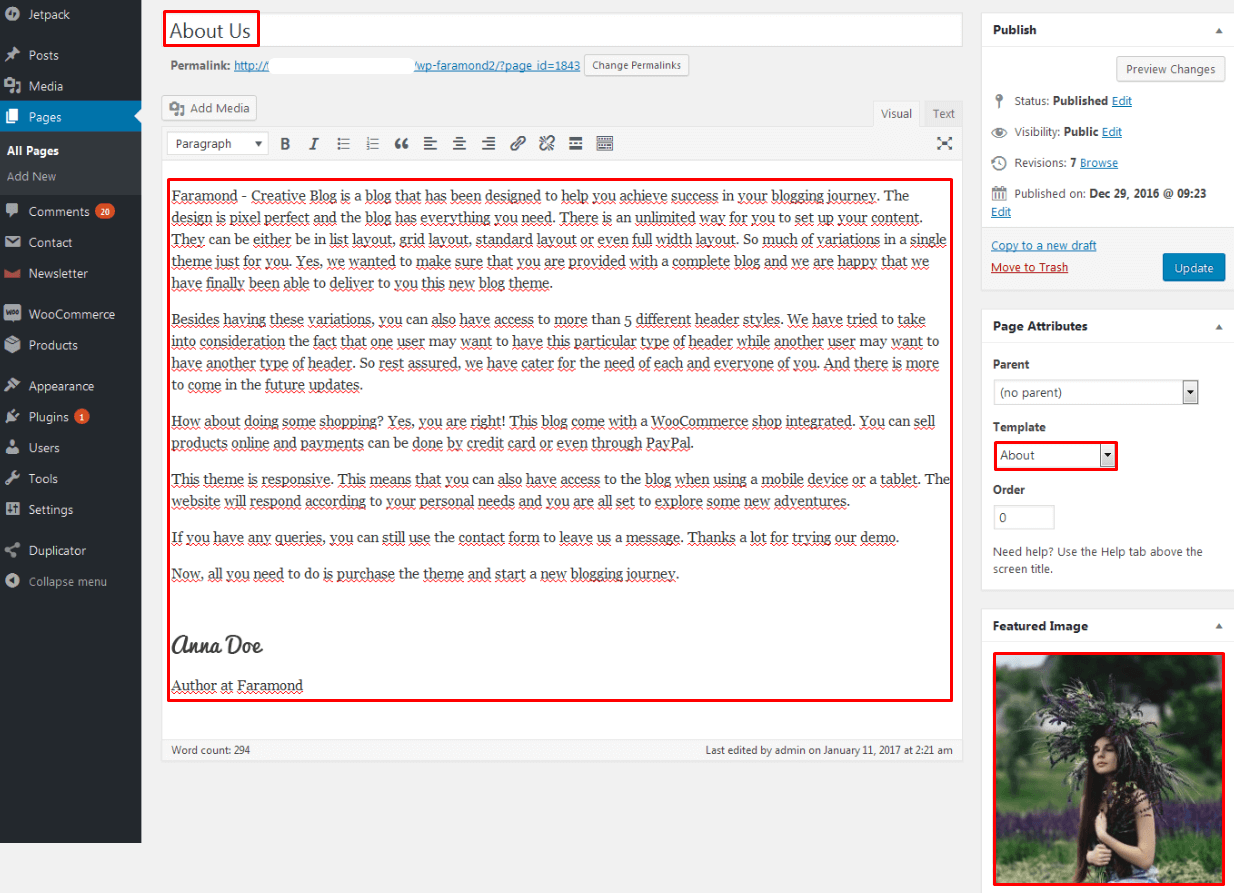
Below is result for About template:

Contact Template
This template often used for Contact page.
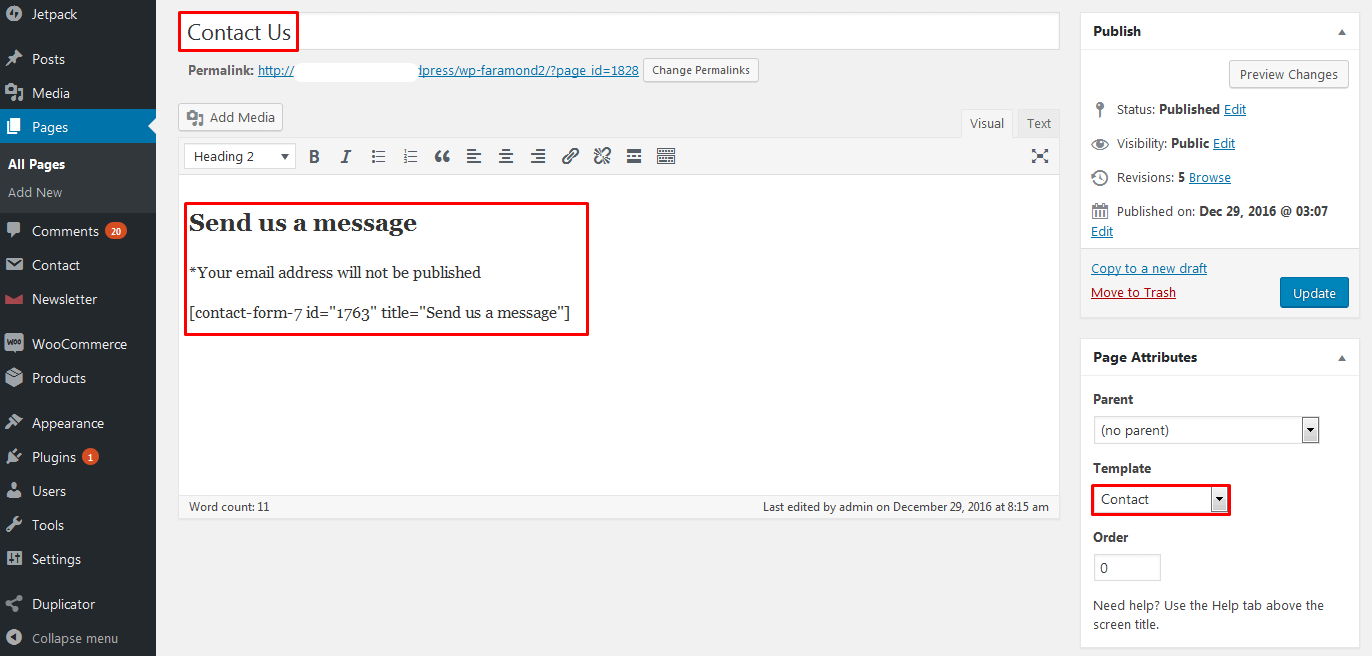
Below is result for Contact template:

Full Width Template
This template is full width layout.

Below is result for Full width template:

Gallery Template
To use this template, please follow steps bellow:
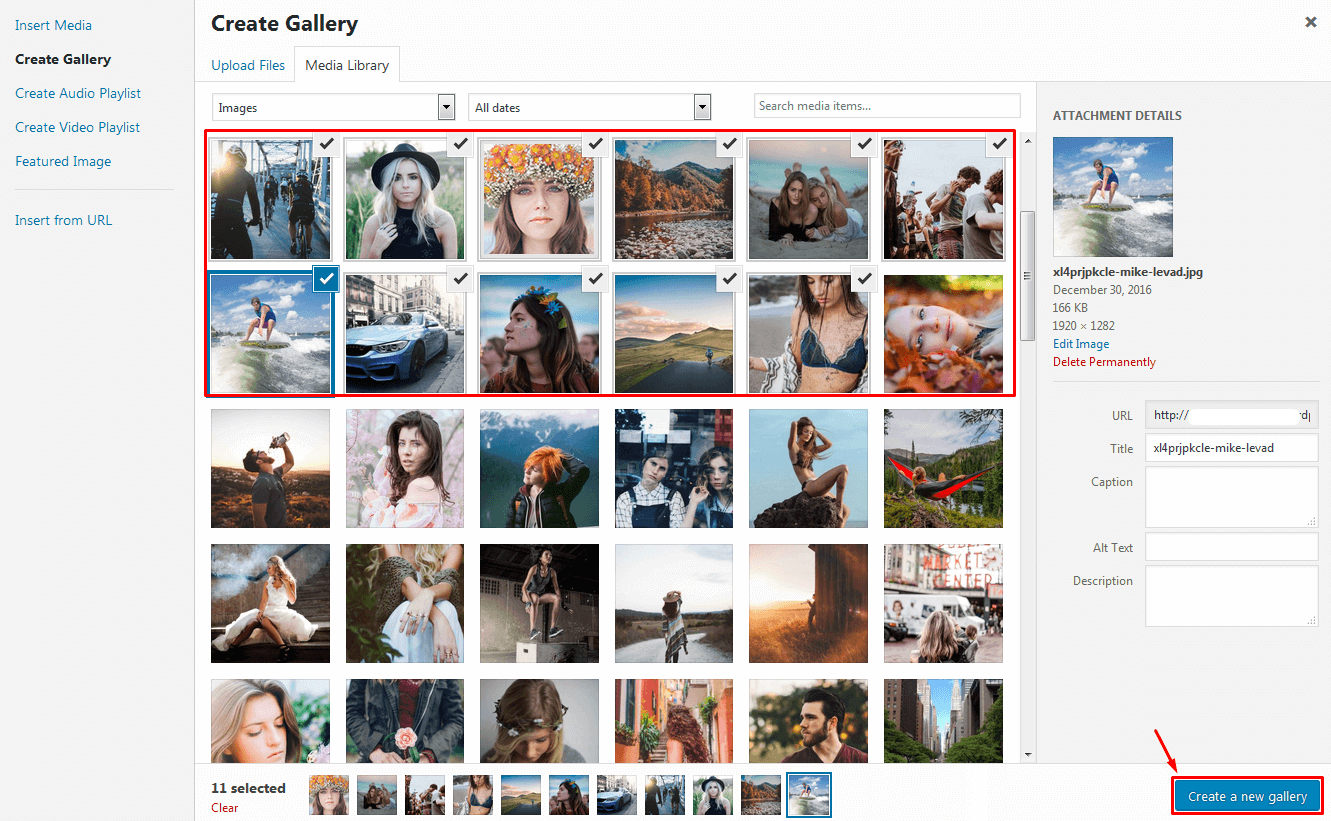
- Enter the page title and click on Add Media button to add gallery.
- Choose Creat Gallery link.
- Select the images that you want to show on the gallery. Then click to Create a new gallery button.
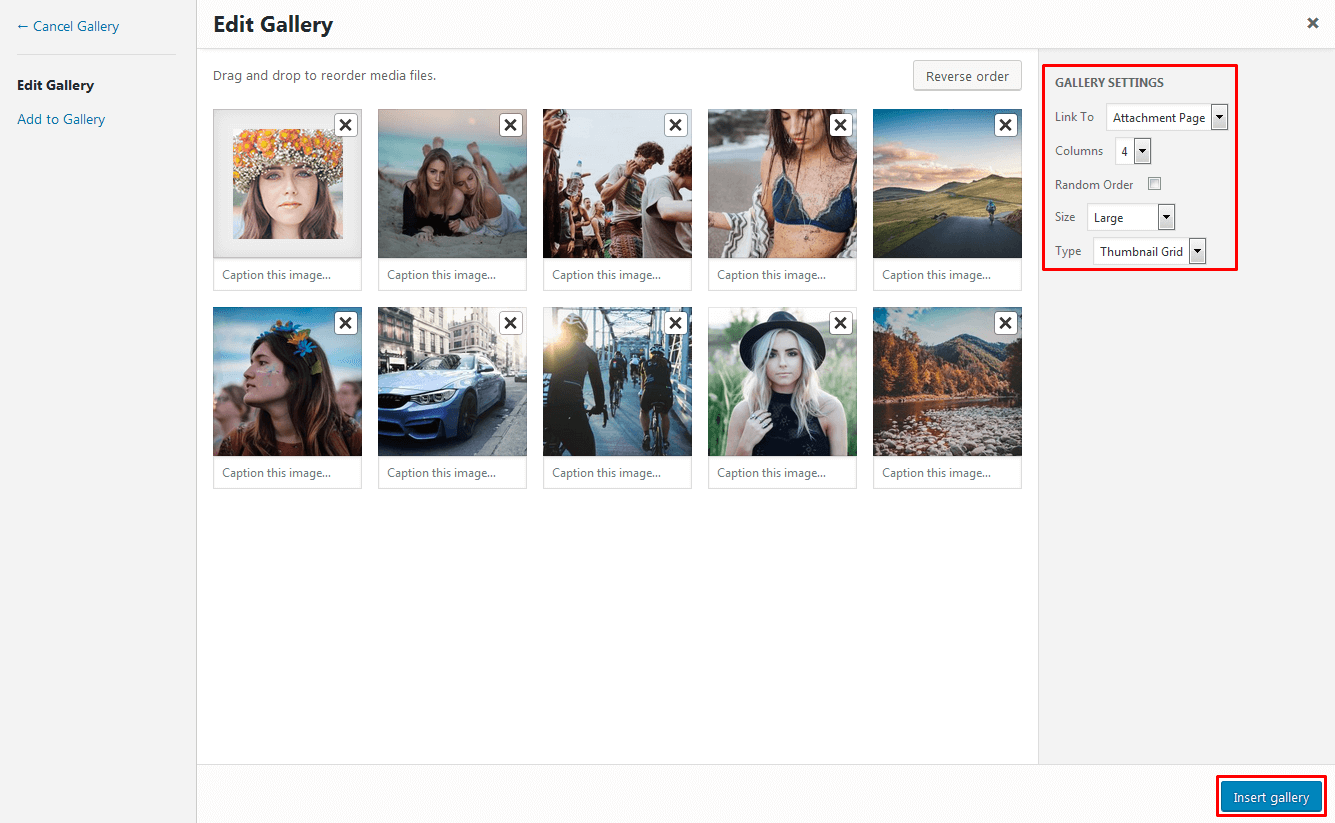
- Next, on Gallery Settings section, you can set Column, size and type for gallery. Then click Insert Gallery button.
- Now, our page will look like the below, click Publish button to see it.
- Click Publish button to see it.


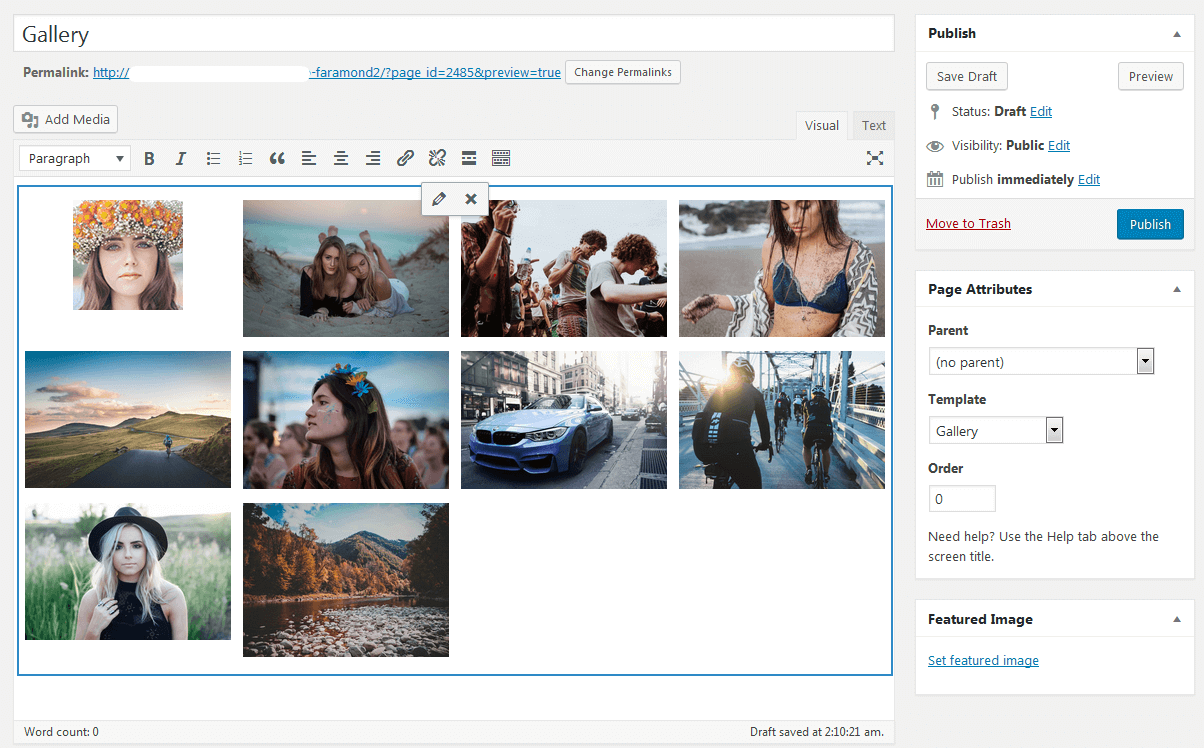

Notice: If the Gallery's dont show, please move to Text tab to edit gallery code. It must be in order: columns, size, ids. It looks like this.

Home Template
This is template default for Homepage.
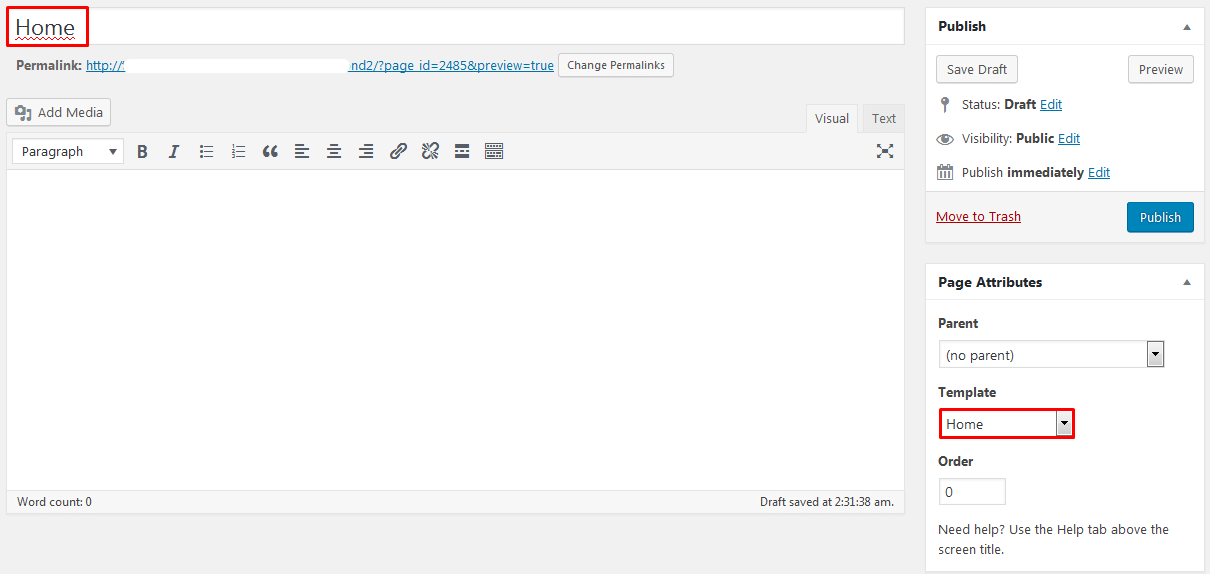
Below is result for Home template:

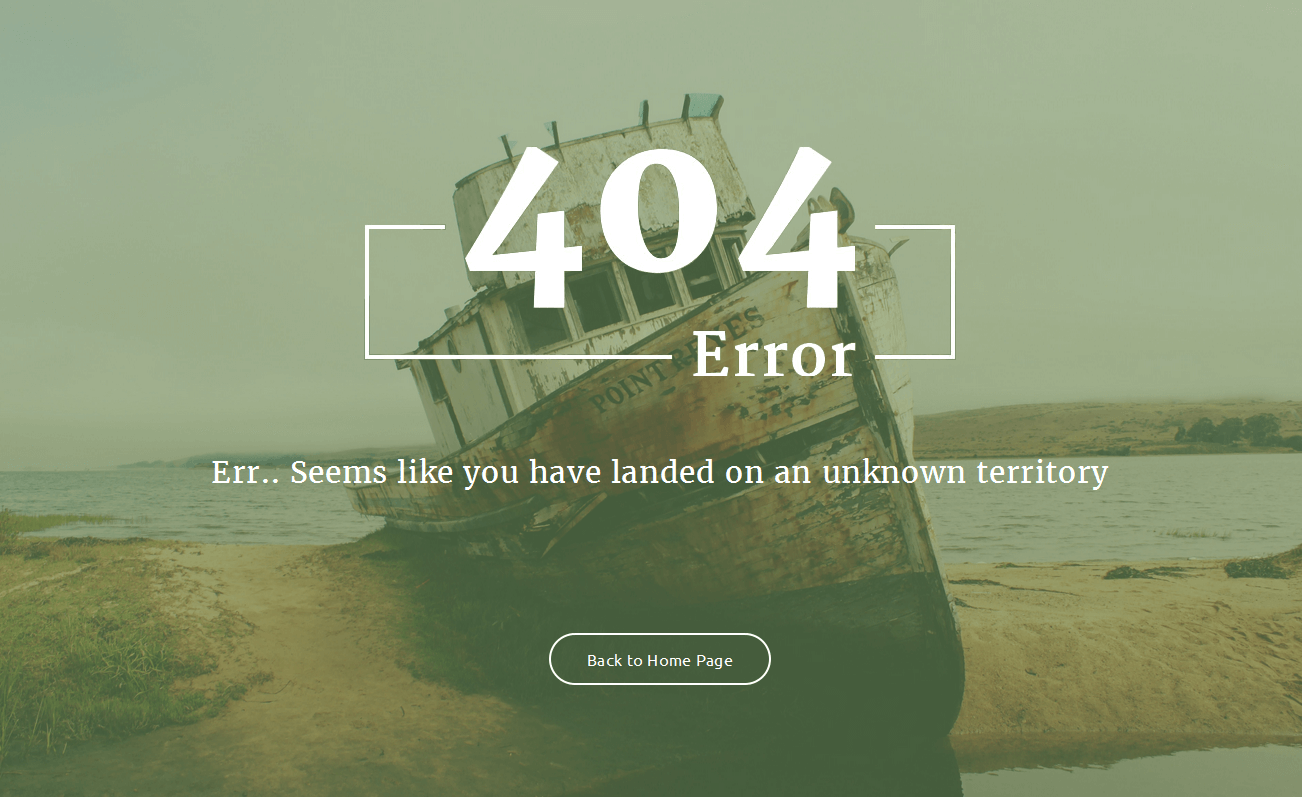
404 Template
This is template for 404 page.
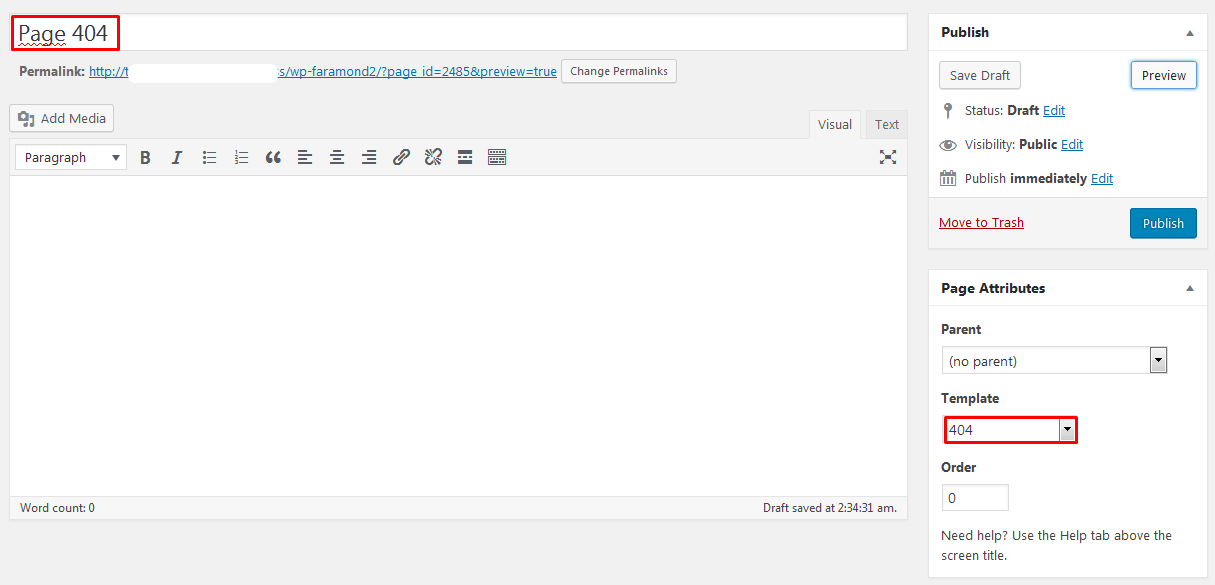
Below is result for 404 template:
Newletter
1. To show the Newletter form, please go to Newletter on the left menu and follow the steps in image bellow:

2. copy this code and paste to Form 1 section:
						<div class="cms-newsletter"><img src ="http://demo.themestrong.com/wordpress/wp-faramond/wp-content/uploads/2016/12/logo-newsletter-3.png" alt=""/>
						<p>Stay connected always no matter what..</p>
						<input type="email" name="email" placeholder ="Enter your email address.."/>
						<button type="submit" class="searchsubmit">subscribe</button></div>

3. Go to Newletter > List building > Subscription tab . In the previous step, your form is Form 1, so here your Subscription page is subscription_form_1.

4. On the Customize section, select Widget > Sidebar Popup Newletter.

5. If you do not import the widget, then you must add Newletter widget. And enter Subscription page on step 3 to Introduction.

Click to Newletter link on sidebar to see the result:

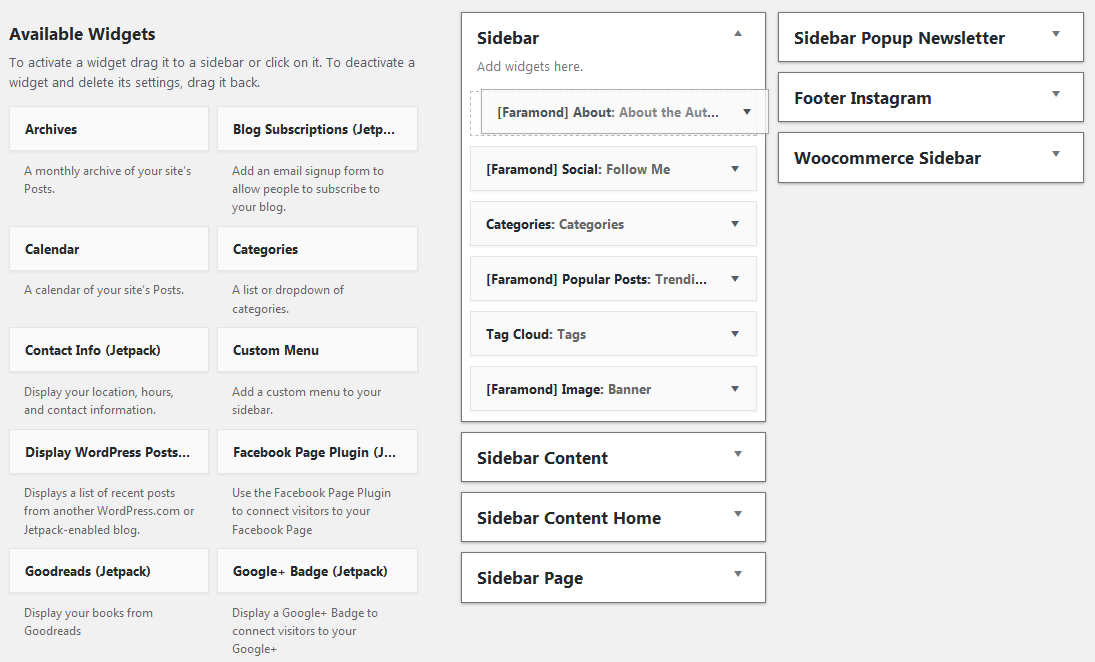
Widgets
Widgets
WPFaramond supports 7 widget areas.
- Sidebar: Default widget area. Shows on Home / Search / Archive and single post.
- Sidebar Content: Widgets in this area will show on the page bottom.
- Sidebar Content Home: Widgets show on Home page.
- Sidebar Page: Widgets in this area will show on the page, ex: Contact page.
- Sidebar Popup Newlleter: This is Newsletter form popup section.
- Footer Instagram: An optional widget area for instagram widget, which is cover full width of the site, shows at very bottom of the page, just before footer.
- Woocommerce Sidebar: Widgets will show on Shop page.
Adding Widgets to Widget Area
- Navigate to Appearance > Widgets to access the list of widgets and widget areas that they can be added. The left hand side show all widgets you can use. The right hand side shows all different areas you can add widgets to.
- Simply drag and drop the widget you want into the area you want to the right hand side.
- When you finished, you can visit the site to see results.
Additional information
You can show/hide sidebars in some particular situations just by visiting Customize, of course you will need to login and have permission for it.
Customize
Start Customize
You can access Customizer in only ways.
From admin dashboard, go to Appearance > Customize.

After Customizer has been started, you will see it on the left hand side of the screen.

Site Indentity
Changing logo.
Just click on Select logo and the upload frame will shows up. Choose your logo image from library or upload new one. Then click Select. You will be promted to crop it, if your image size if smaller than 480x240 the Skip cropping button will shows up just in case you don't want to crop. Otherwise, you will have to crop, we don't want 1Mb logo, don't we? :-)
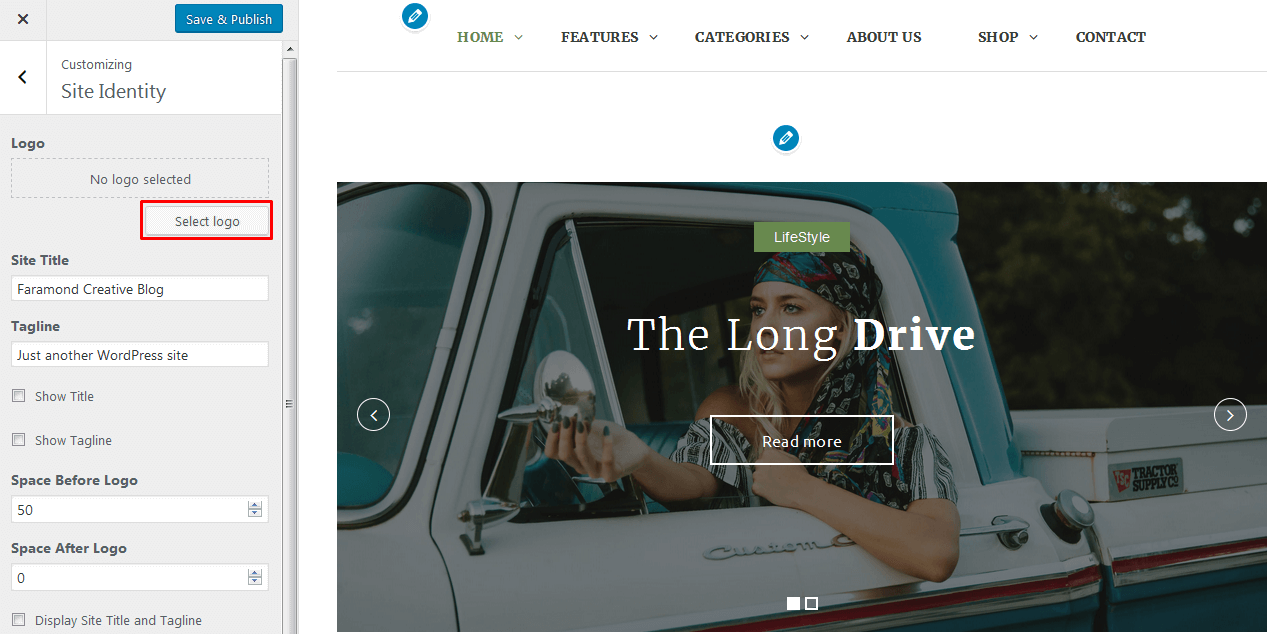

The results
You will want to hide text, just simply uncheck Display Site Title and Tagline. Or if you just don't want a logo, then check this and remove logo :-). Title and tagline can also be changed via these two fields as you can see bellow.

Site Icon
Favicon for the site. You will need to select image and crop just like above, image must be square and at least 512 pixels wide and tall as it already recommened

Social
Social Profiles
Here you can add your social network profile links and icons will shows up. Both at footer and social icon widget. Just simply enter links ( URLs ) into the fields. Notice you must enter the link, social icon display.

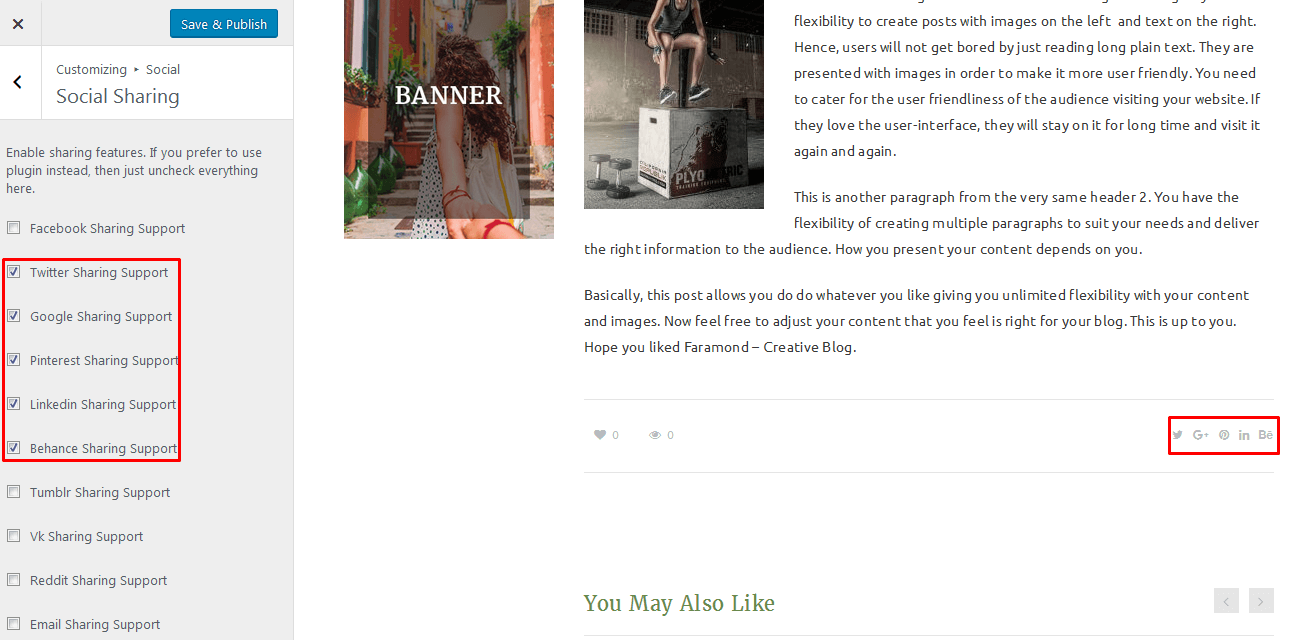
Social Sharing
Here, just simply check to box of social icon then you want to show, it will show on the posts.

And show on Blog single page.
Header
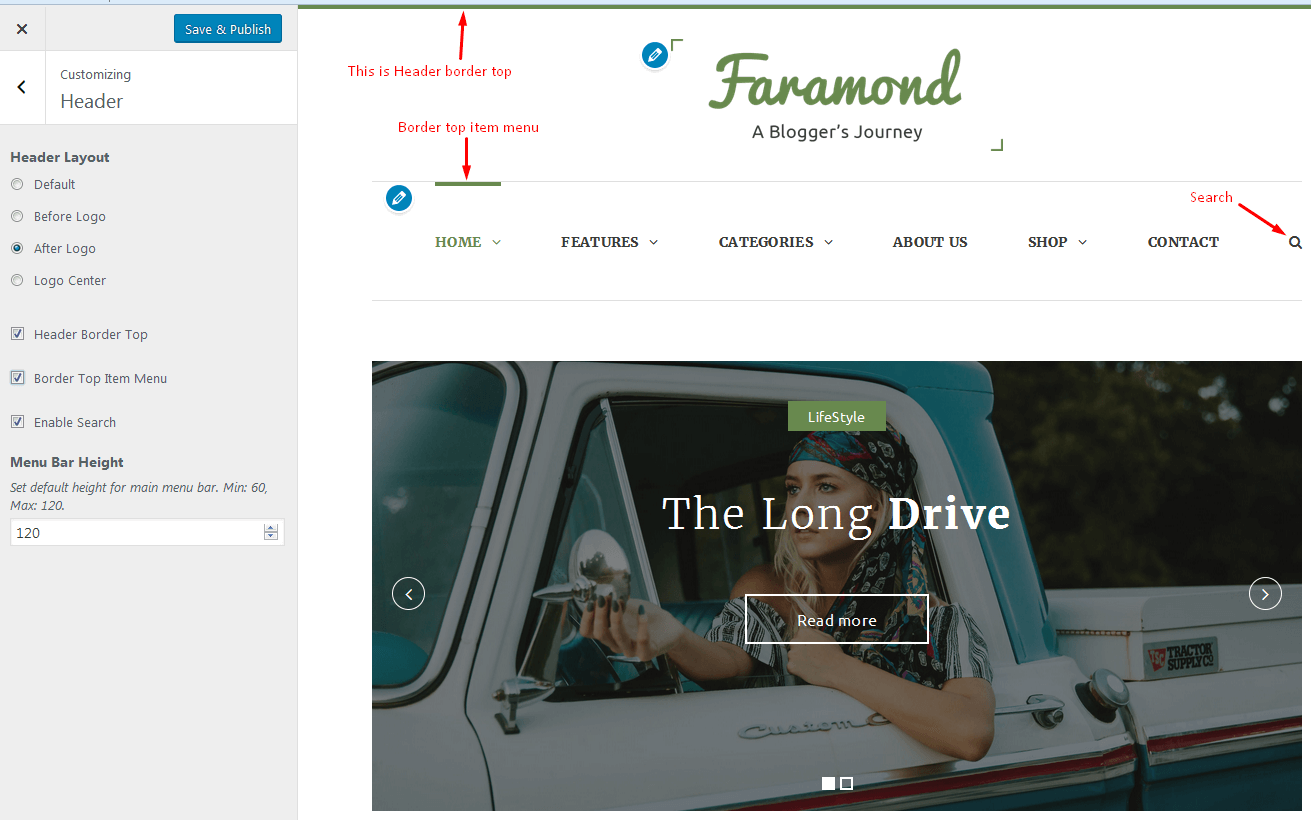
- Header Layout: Select a layout for header.
- Header Border Top : Show/hide border top.
- Border Top Item Menu : Show/hide border at the upper menu item
- Enable Search: Show/hide search icon on the main menu bar.
- Menu Bar Height: Set default height for main menu bar.
Featured Area
Featured area only shows at home page. You can configure it here.
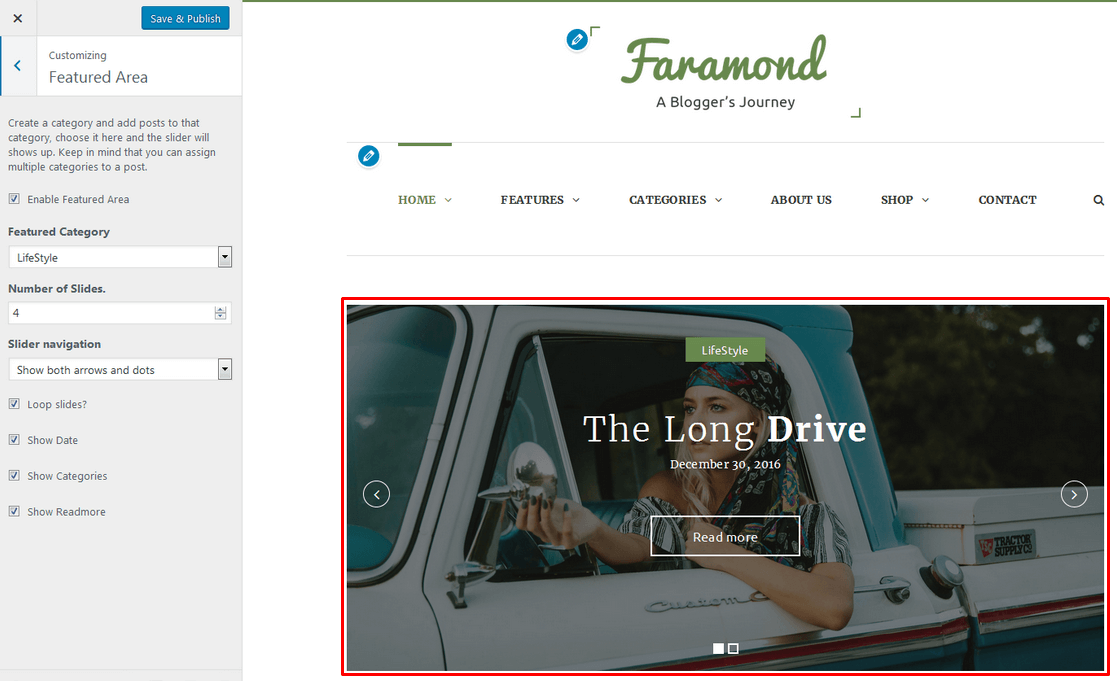
- Enable Featured Area : For it to work, firstly you need to enable it by check on Enable Featured Area
- Featured Category : Choose a Featured category
- Number of Slides. :Choose how many items you want to show by enter Number of Slides
- Slider navigation :Choose slider style.
- Loop slides :Check this if you want your slider is loop.
- Show Date :Check to show Date on slider.
- Show Categories :If you don't want featured category name appears on any post info ( post meta ) then check this.
- Show Readmore :Check to show Readmore button.
General
This section contains configurations for general posts and some site's behaviors.
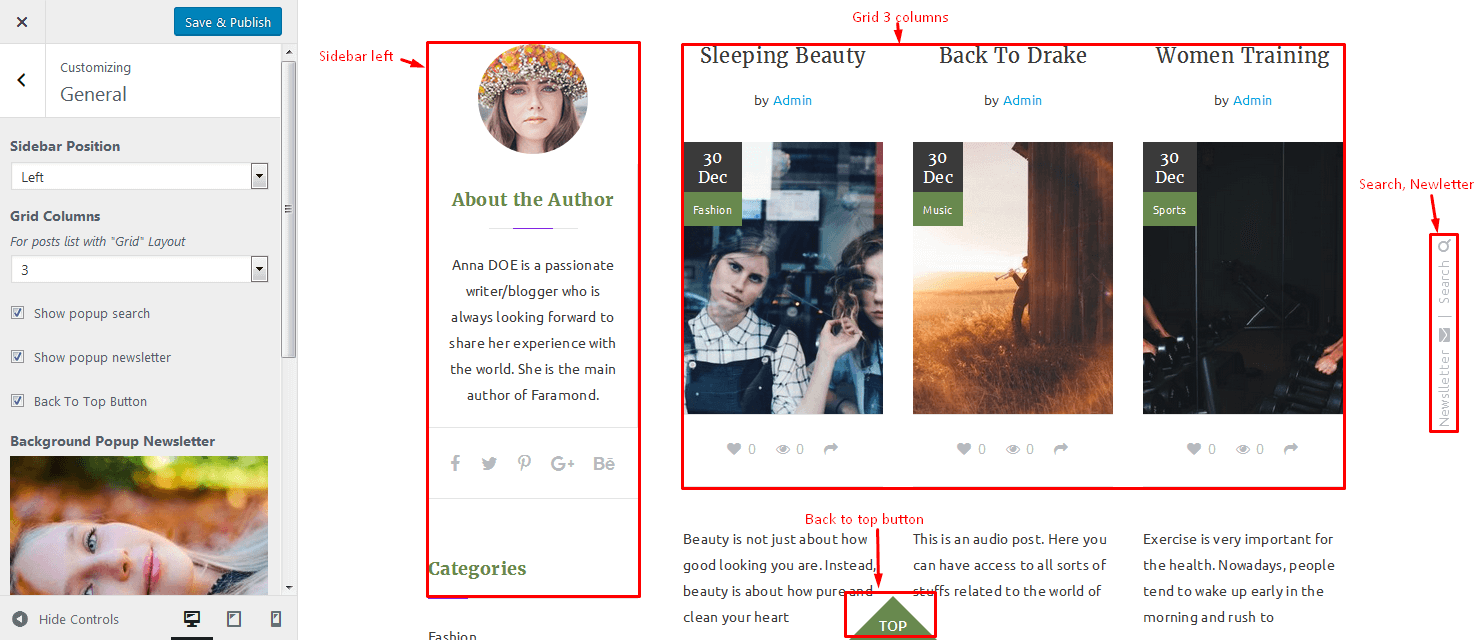
You can have different layout for home and archive page. Just check the radio button and checkboxes.
- Sidebar Position: Select position of sidebar.
- Grid Columns: Work for posts list with "Grid" Layout.
- Show popup search : Check to show Search.
- Show popup newsletter : Check to show Newletter.
- Back To Top Button : Check to show Back to top button. It will show when scroll down.
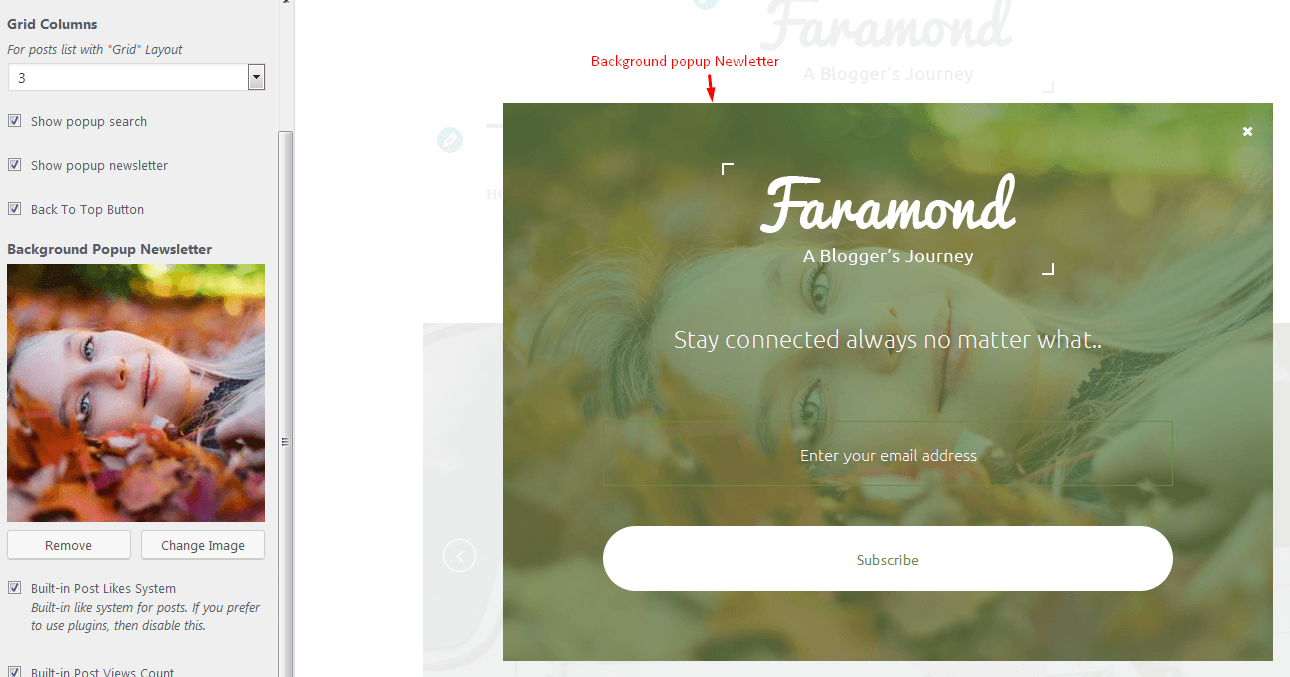
- Background Popup Newsletter: Select an image make background for Newletter popup.
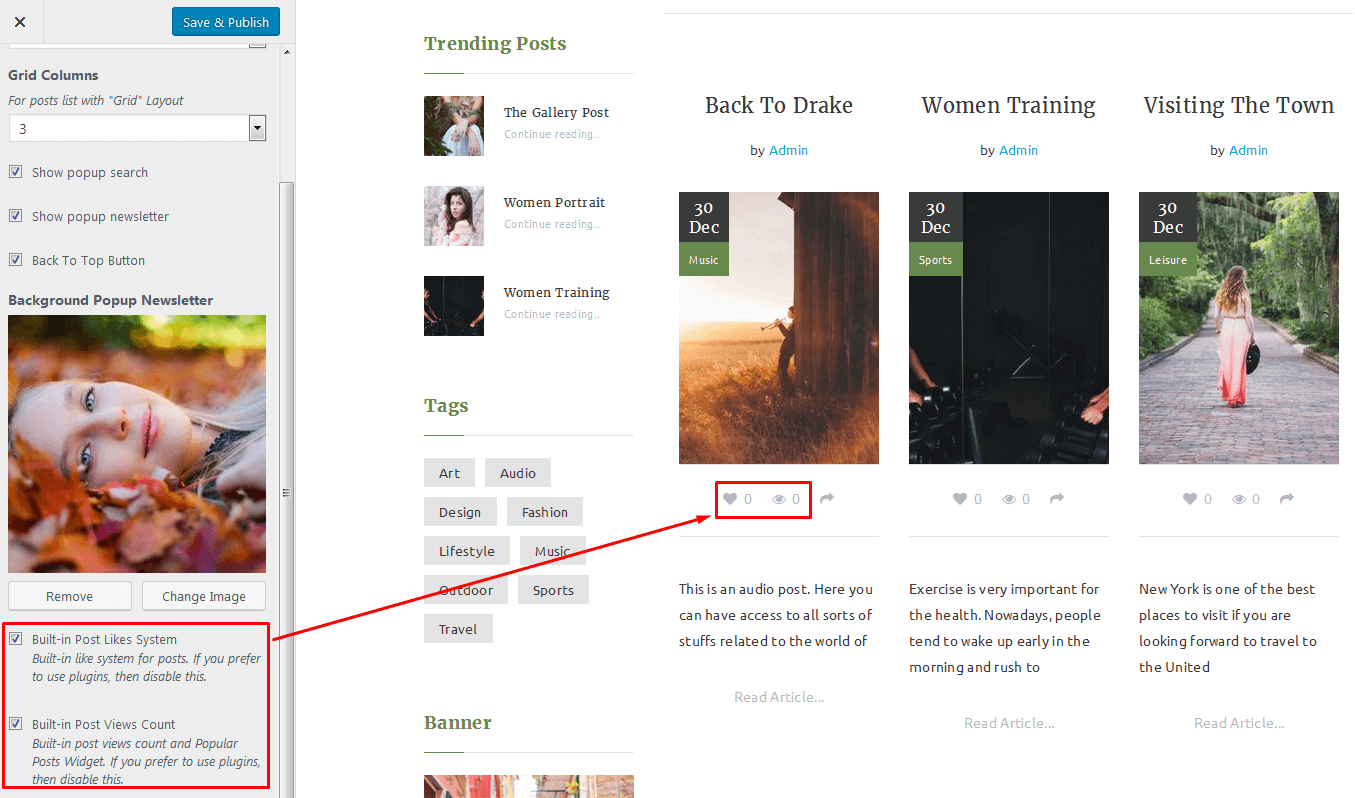
- Built-in Post Likes System : Built-in like system for posts. If you prefer to use plugins, then disable this.
- Built-in Post Views Count : Built-in post views count and Popular Posts Widget. If you prefer to use plugins, then disable this.
Blog Home
Home Posts Layout: Select a layout for Home post.
Below is the Default layout:

This is List layout:

And Grid layout:

Blog Single

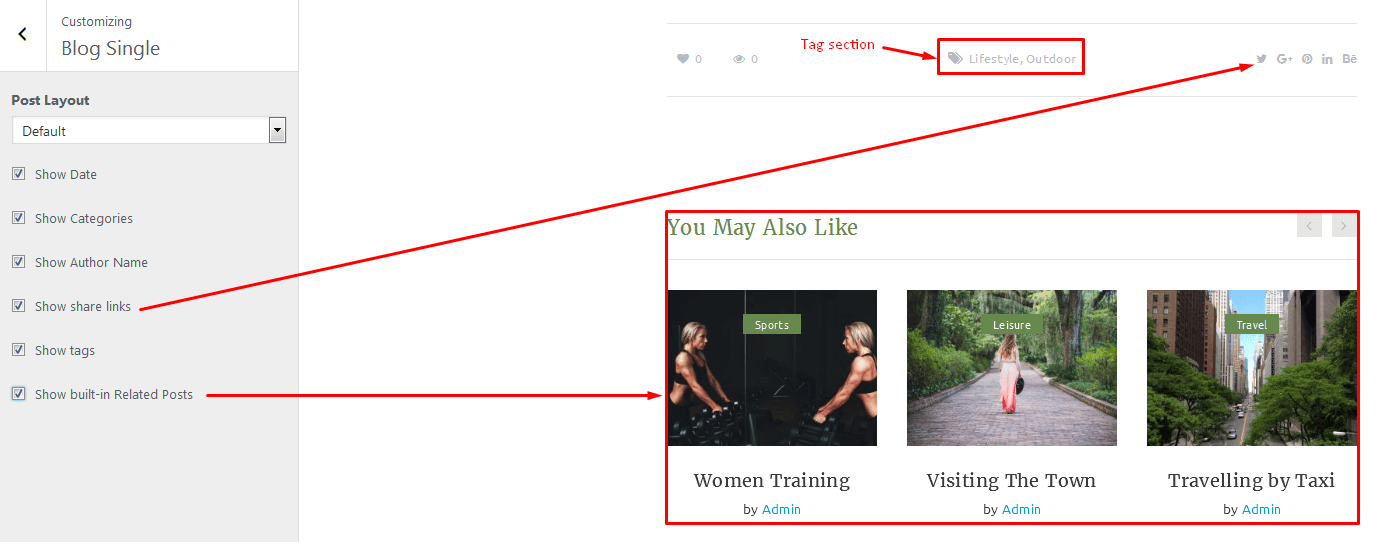
- Post layout: If Full is selected then all sidebar option will be passed, and single post will show at full width but smaller container.
- Show Tags: Show/hide post tags.
- Show Author Info Box: Show/hide author info as well as author social profiles. This can be configured through Dashboard/Users.
- Show Related Posts: Built-in related posts based on categories and tags, if you prefer to use plugin instead then uncheck this.
Footer

Please note that, the footer does not contain Instagram Widget, it's seperated from footer area.
- Copyright Info: Copyright info appears at very bottom of the footer.
- Show social icons: Show/hide Social icon at right hand side of the footer. You can customize social links at Social section.
- Footer padding top: Add padding top for the footer.
- Footer padding bottom: Add padding bottom for the footer.
Woocommerce
This option use config for the Shop page. It is page default of Woocommerce.

- Woo Layout: Select layout for shop page.
- Woo Columns: Select the columns.
- Item Per Page: Enter nember product items.
Colors

- Background Color: Background color for the whole site.
- Text Color: Main text color.
- Main Color: Use for headings, some element backgrounds ( like subscription form, footer etc. ), and some other element text color.
- Link Color: Color of Link.
- Link Detail Color: Color of View, count number, comment and social icons.
- Link Author Color: Color of Author name.
- Border color: General border color.
- Text Featured Color: Color of text on Feature area.
Background Image
Set background image for the whole site. You select image by open Media Library or upload new, the process is just like selecting a logo.
You can choose to default, Fill Screen, Fit to Screen or Repeat and set position of the image and image attachment.

Other Sections
Menus
Select nav menu and location for the theme, these configurations are just like creating menu, add menu locations... at admin interface. See Menu section for detailed instructions.
You will see these settings is pretty easy to work with, even though you are new to Wordpress. Because it's Wordpress's default customize section.
Widgets
Create, add, remove widget from widget area. These configurations are just like creating widget, add widget to widget area... at admin interface. See Widgets section for detailed instructions.
You will see these settings is pretty easy to work with, even though you are new to Wordpress. Because it's Wordpress's default customize section.
Translation
Translating the theme
The theme is compatible with WPML plugin, thus can be translated into multiple languages. Follow this link for guide. You can also use POEdit plugin for translation.
- Located the .po and .mo files in folder /languages.

- Select language in admin options.
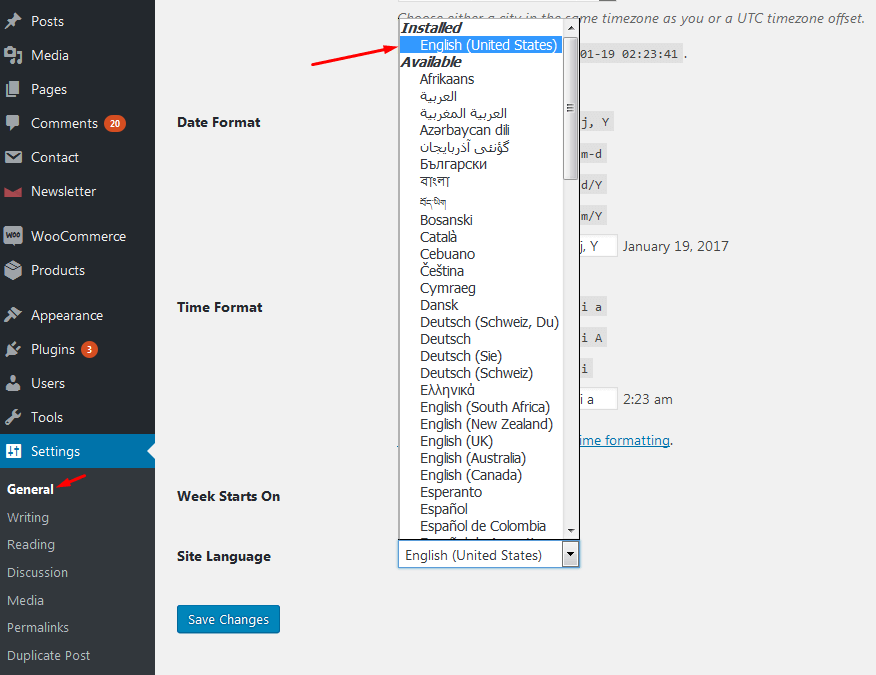
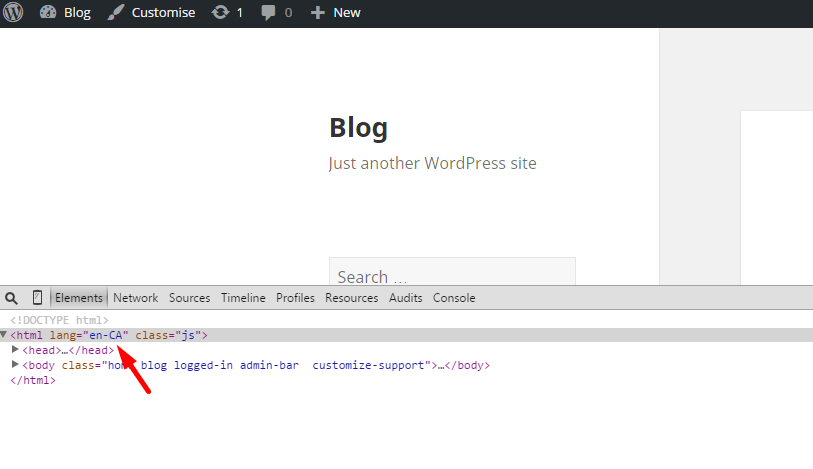
- Find language code (save option and reload front-end view html).
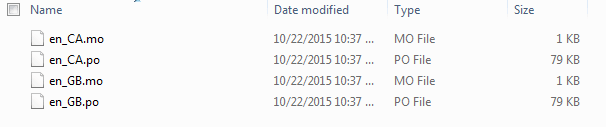
- Copy two files .po & .mo and rename them with the code you've just get from previous step ( eg: en_CA.mo & en_CA.po ). Same for other languages.
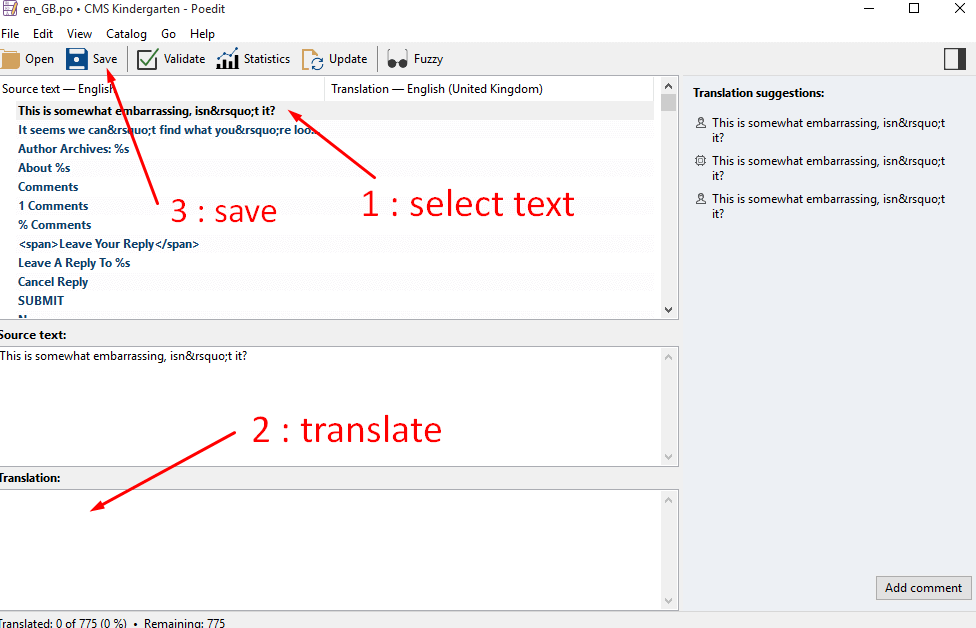
- Open the file .po with POEdit and translate the texts into your preferred language.
- When complete, you’ll want to save the file twice, as two separate files – a .po file and a .mo file. When you save the files, you must name them according to your language code. Find a list of language codes at WordPress in your Language. As an example, the language code for English is en_EN, so you would save the translated files as en_EN.po first, then en_EN.mo.
- When you're done, simply upload the files to your theme's language folder.
SEO
SEO
Our themes are optimized by with H1, H2, H3, H4, H5 tags, clean code, HTML5 but if you want to get higher ranking on search engines, you must need some help from SEO plugins and Google Pagespeed Service:
Update
Update
1. Update theme
There are 2 methods to update our WordPress themes to a newer version. These new updates are essential if you want to have a bug free website, as we add new features and make improvements to the theme over time. Some of these updates might be needed in order to make the theme compatible with newer versions of WordPress. There is no risk of losing your settings and pages. However, if you had made modifications to theme files, they will be lost.
1.1 Update Faramond Through WordPress Admin Panel:- For this method you should first install the Theme Upgrades Tool.
- Unzip the file you just downloaded from ThemeForest and locate the WordPress Theme. (wp-Faramond.zip).
- Login to your WordPress Dashboard.
- Click on “Appearance > Themes”.
- Click on Add New button on this page
- Click on Upload Theme Button
- Click “Choose File” and locate the new theme file. (wp-Faramond.zip).
- In the “Upgrade existing theme?” option choose “Yes” from the dropdown list.
- Click “Install Now”.
- Click “Activate”.
- Login to your Themeforest account and go to downloads (Dashboard > Downloads).
- Download the theme to your computer.
- Install an FTP program (for example, Filezilla is free).
- Retrieve your FTP login information from your hosting admin panel and login into your hosting via FTP.
- Unzip the item main file.
- Locate theme.zip (wp-Faramond.zip) and unzip it. Make sure your unzipping software does not create an extra directory with the same name, nested into each other.
- Drag and drop theme main folder into your FTP program with the destination: “YOUR_HOSTING_ROOT/YOUR_SUBDIRECTORY/wp-content/themes/”.
- The FTP program will give a warning that there is an existing directory with the same name, choose to Replace All.
- It will take between 15 to 30 minutes to replace all files. Once you are done, login to your WordPress dashboard and go to Theme Options. On the header (beside Theme Options logo) the theme version will be changed to the latest version. This is the indication that your theme is updated. We recommend method one which takes less than one minute.
2. Uplodate necessary plugins
When the time comes that you want to update our themes to the latest versions you may need to update necessary plugins of theme. To update the plugin you will need to follow the steps below:
- 1 Deactivate plugins
- 2 Delete plugins
- 3 On the Dashboard, go to Appearance->Install plugins to reinstall plugins.
Support
Support
The team at CMSSuperheroes are always happy to help you with any questions or recommendations you have about the Garden theme.
If you need any help or support please contact us through:
- Themeforest Messaging system.
- Email: support@cmssuperheroes.com
- Our Forum